
Attach vinyl shutters to vinyl siding using siding clips, mounting blocks, or through-siding anchors.
I’ve installed dozens of shutters and taught many homeowners how to attach vinyl shutters to vinyl siding safely and cleanly. This guide covers planning, tools, materials, three trusted mounting methods, a step-by-step install, common mistakes, maintenance, and pro tips I learned on the job. Read on to get a secure, long-lasting installation that looks factory-made.

Tools and materials you will need
Make a short parts list before you start. Use quality items for best results.
- Vinyl shutters sized for your windows
- Mounting clips for vinyl siding or shutter mounting blocks
- Stainless steel or coated exterior screws and anchors
- Drill with bits for wood and masonry
- 1/8", 3/16", and 1/4" drill bits
- Level and tape measure
- Pencil and masking tape
- Caulk gun and exterior silicone or polyurethane sealant
- Utility knife and snap-lock siding tool (if needed)
- Safety glasses and work gloves
Having the right tools helps when you attach vinyl shutters to vinyl siding. I always keep extra screws on hand. They save time when a wrong size breaks.

Planning and measuring for a solid install
Measure windows and shutters twice. A good plan avoids mistakes.
- Measure window height and width. Compare to shutter specs.
- Check for obstructions like lights or trim. Mark conflicts.
- Decide shutter spacing from window edge. Standard is 1/4" to 1/2".
- Choose mounting method: siding clips, mounting blocks, or through-siding anchors.
- Locate studs or backing if possible. Anchoring into solid backing is best.
When I started, I learned to check for studs. Screwing only into siding can fail in high winds. Planning saves rework.

Preparing the siding and shutters
Prep protects siding and gives a clean look.
- Clean the siding area with mild soap and water. Let it dry.
- Remove or unlock any snap-on siding panels if you must access the sheathing.
- Pre-fit shutters and mark hole locations with masking tape and pencil.
- If using mounting blocks, install them level and sealed to the siding.
Prep cuts installation time. A clean surface and proper layout make it look professional.

Mounting methods: choose the right approach
There are three common ways to attach vinyl shutters to vinyl siding. Pick the one that fits your wall and budget.
Siding clip method
Siding clips attach behind the siding panel and lock onto the shutter screw.
- Pros: Fast. Minimizes holes in siding. Good for retrofit.
- Cons: Requires removing or loosening siding panels. Not ideal for heavy shutters.
This method worked well for me on a house with easy-to-remove panels. It held fine in normal weather.
Mounting blocks method
Mounting blocks are plastic or composite blocks attached to the siding surface. Shutters then screw into blocks.
- Pros: Solid anchor surface. Great for matching trim. Hides uneven siding.
- Cons: Adds small profile. Blocks must be sealed well.
I use blocks when siding is thin or when the shutter back is uneven. They give a neat finished look.
Through-siding anchor method
Screws pass through siding into sheathing or studs with washers and exterior screws.
- Pros: Most secure. Best for high wind areas.
- Cons: Requires cutting siding and sealing screw penetrations carefully.
I used through-siding anchors on a second-story install. It required more work, but it felt rock solid.

Step-by-step: how to attach vinyl shutters to vinyl siding
Follow this clear sequence for a reliable result.
-
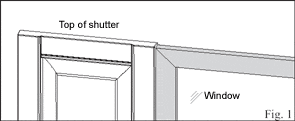
Lay out shutter position
- Center shutter to the window. Mark top and bottom with pencil.
- Use a level to ensure vertical alignment.
-
Mark mounting hole locations
- Place shutter against siding. Mark holes through factory holes or pilot locations.
- Place masking tape if the siding is glossy to prevent marking.
-
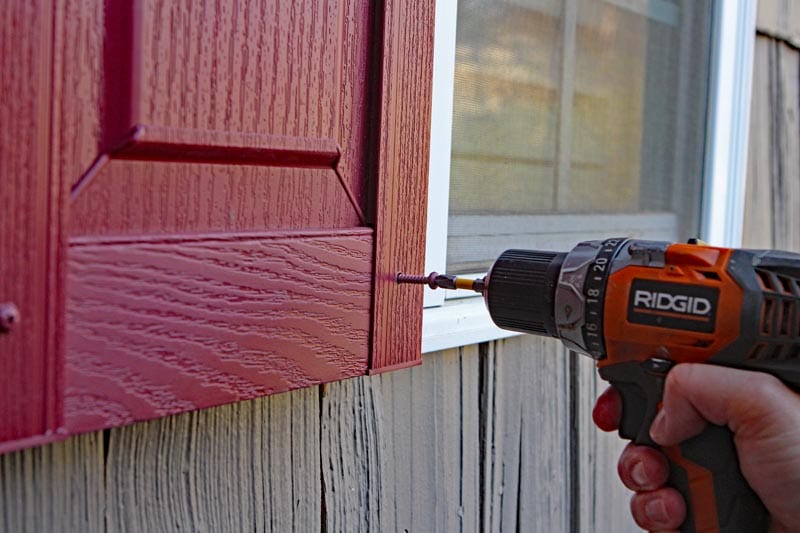
Choose method and drill pilot holes
- For siding clips: remove siding panel slightly and clip behind. Drill into clip through shutter hole.
- For mounting blocks: attach block with exterior screws, seal the block perimeter, then screw shutter to block.
- For through-siding anchors: drill holes through siding into sheathing or studs. Use flashing or sealant after screws are set.
-
Fasten shutters
- Use stainless or coated exterior screws. Tighten snug but do not over-torque.
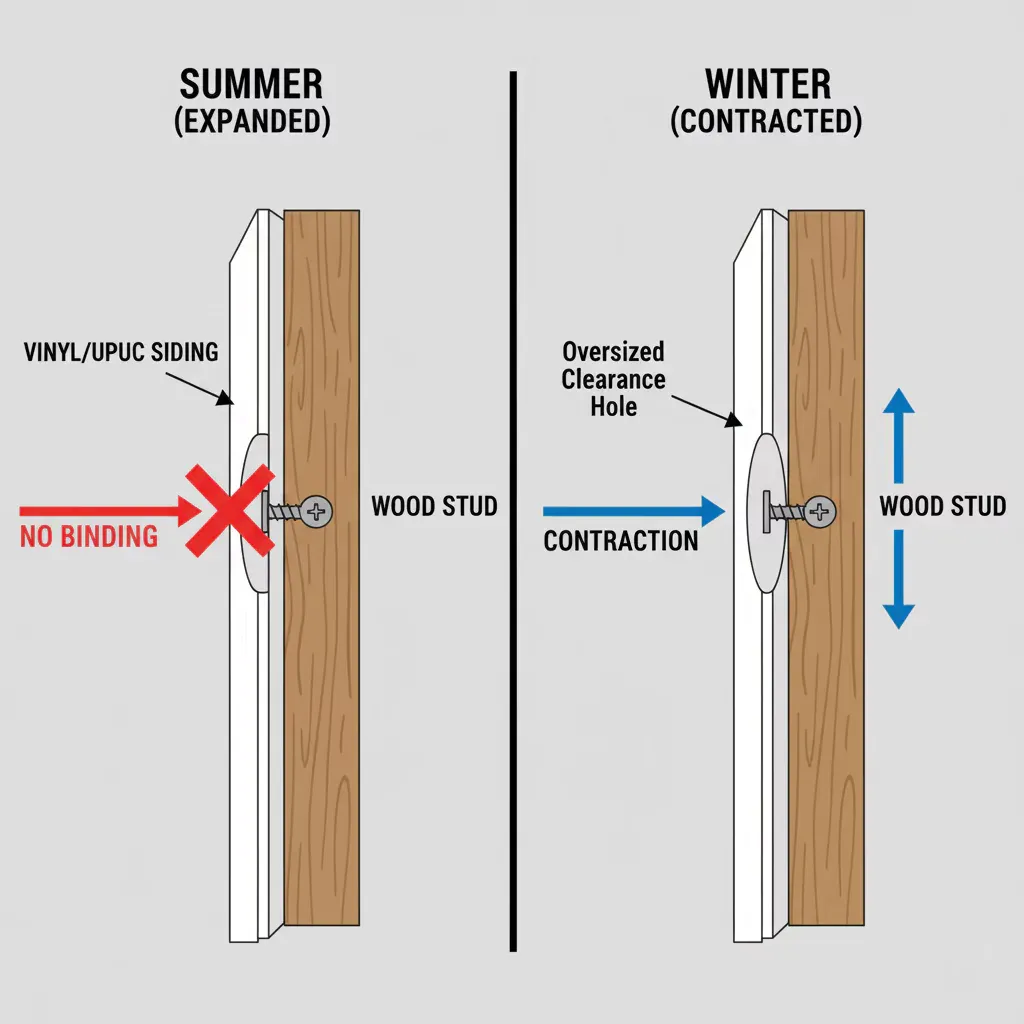
- Leave 1/8" clearance for vinyl expansion where instructed.
-
Seal and finish
- Apply a small bead of exterior silicone at any new siding penetrations or block edges.
- Re-secure any siding panels you loosened. Clean off excess sealant.
-
Final check
- Test shutters for wobble. Re-tighten as needed.
- Inspect for gaps and water entry points.
Repeat for each shutter. This standard process explains how to attach vinyl shutters to vinyl siding in a safe way.

Common mistakes and how to avoid them
Avoid these to keep shutters secure and curb appeal high.
-
Driving screws too tight
- Problem: Warps shutters or compresses siding.
- Fix: Tighten until snug, then back off slightly.
-
Ignoring thermal expansion
- Problem: Cracking or buckling in heat.
- Fix: Allow small clearances per manufacturer.
-
Not sealing screw penetrations
- Problem: Water intrusion and rot risk.
- Fix: Use exterior-grade sealant on exposed holes.
-
Anchoring only into siding
- Problem: Pull-out under wind load.
- Fix: Use mounting blocks or through-siding anchors to reach backing.
I once installed shutters without blocks on a windy street. Within a year, two shutters loosened. I reinstalled with through-siding anchors and it never moved again.
Maintenance and long-term care
Simple care keeps shutters looking new.
- Clean shutters twice a year with soap and water.
- Inspect attachments annually, especially after storms.
- Re-seal any visible screw holes or cracked sealant.
- Tighten loose screws and replace corroded fasteners.
Proper care extends life. I check mounts after winter and after heavy weather.

Personal tips from experience
A few practical tips I use on every job.
- Pre-drill holes in shutters to avoid cracking.
- Use painter’s tape to mark level lines and protect siding finish.
- Label left and right shutters and keep their fasteners together.
- Always test one shutter fully before installing all others.
These small steps speed the job and reduce errors.
Frequently Asked Questions of how to attach vinyl shutters to vinyl siding
Can I attach vinyl shutters directly to vinyl siding?
Yes. You can attach directly using siding clips or mounting blocks, but secure anchors into backing if possible to improve strength.
Do I need special screws for vinyl shutters?
Use stainless steel or corrosion-resistant exterior screws. These resist rust and hold well in outdoor conditions.
Will drilling holes in siding cause leaks?
Not if you seal the penetrations properly with exterior-grade sealant and use correct washers or mounting blocks to shed water.
How far should shutters sit from the window?
A small gap of about 1/4" to 1/2" from the window edge is typical. This allows for expansion and a balanced look.
Which method is best for high-wind areas?
Through-siding anchors into studs or sheathing are best. They transfer load to solid structure and resist pull-out.
Can I install shutters myself or hire a pro?
Many homeowners can do it themselves with basic tools. Hire a pro if you need to cut siding, locate backing, or work from a ladder.
Conclusion
Attaching vinyl shutters to vinyl siding is a doable project with the right plan, tools, and method. Pick siding clips, mounting blocks, or through-siding anchors based on your siding and local winds. Measure carefully, pre-drill, seal all penetrations, and allow for thermal movement. Take your time and follow the steps above to get a secure, tidy install that lasts. Ready to try it? Gather your tools, test one shutter first, and share your results or questions below.