
Remove old unit, flash opening, set, shim, seal, and match vinyl trim.
You want a clean, weather-tight fit that looks factory-made and lasts. In this guide, I show you how to install a replacement window with vinyl siding the right way, from first measure to final caulk line. I blend pro tips with simple steps so you avoid leaks, drafts, and call-backs. If you have basic tools and patience, you can nail a pro-level result.
Tools, Materials, and Prep Checklist
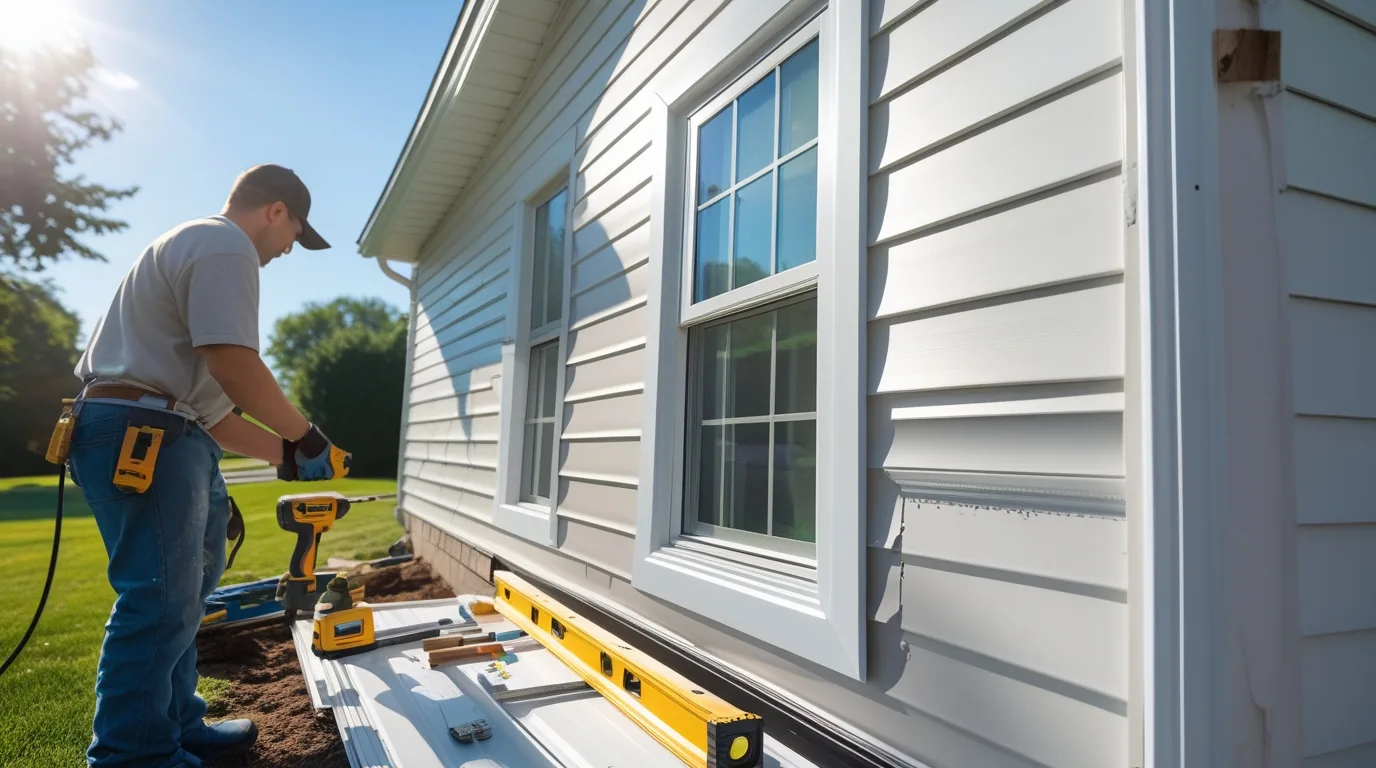
A smooth job starts with good prep. When you learn how to install a replacement window with vinyl siding, you need the right tools and a plan for weather, trim, and sealant. Clear the area, set a tarp, and work on a dry day above 40°F.
Tools
- Tape measure, speed square, level, and plumb bob
- Oscillating tool, pry bar, and utility knife
- Drill/driver with bits and countersink
- Caulk gun and shears for vinyl
- Stapler for house wrap and flashing
Materials
- Replacement window, new-construction or insert style
- Exterior flashing tape and flexible sill pan tape
- Self-seal membrane or house wrap patches
- Low-expansion spray foam and backer rod
- High-quality exterior sealant, paintable and UV stable
- PVC trim, J-channel, and sill nose if needed
- Stainless or coated fasteners approved by the window maker
Pro prep steps
- Check the forecast and plan enough light to set and seal.
- Remove blinds and trim. Lay a cloth to protect floors.
- Verify the window’s rough opening size and delivery condition.

Understand Your Opening and Window Types
Before you start how to install a replacement window with vinyl siding, confirm what you have. Most homes have either a finned new-construction window under the siding or an older wood frame with stops. Your path depends on that base.
Key terms
- Rough opening. The framed hole. It should be about 1/2 inch bigger than the window.
- Insert window. Fits inside the old frame. Fast and neat, but can reduce glass area.
- New-construction window. Has a nailing fin. Best for full flashing and highest water control.
Measure right
- Measure width and height in three spots. Use the smallest numbers.
- Check diagonal measurements. A big difference means the opening is out of square.
- Note sill slope. Many sills have a 6 to 10 degree pitch. Plan your sill pan to match.
When to choose insert vs fin
- Insert is good if the old frame is sound, square, and dry.
- Fin is best if the frame is rotten, leaky, or you can expose the sheathing under siding.
Step-by-Step: How to Install a Replacement Window with Vinyl Siding
This section gives clear steps you can follow today. If you need to teach a helper, read this out loud and point at the work.
Step 1: Inspect and plan the tie-in
- Identify trim parts. Find J-channel, window trim, and any drip cap.
- Decide if you will remove only trim or also unzip siding.
- Sketch how water will shed from top to bottom.
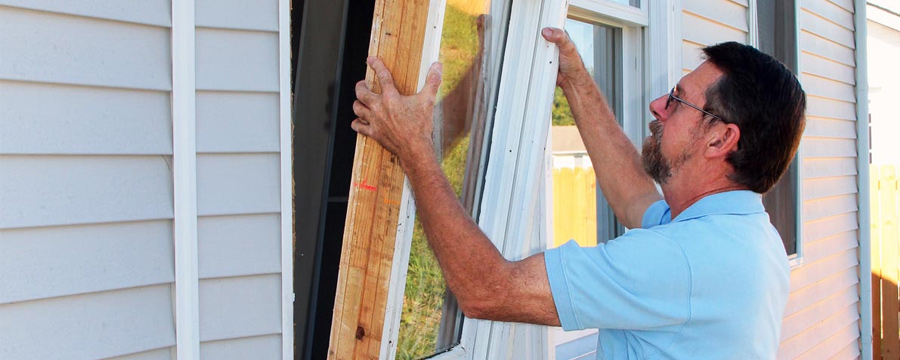
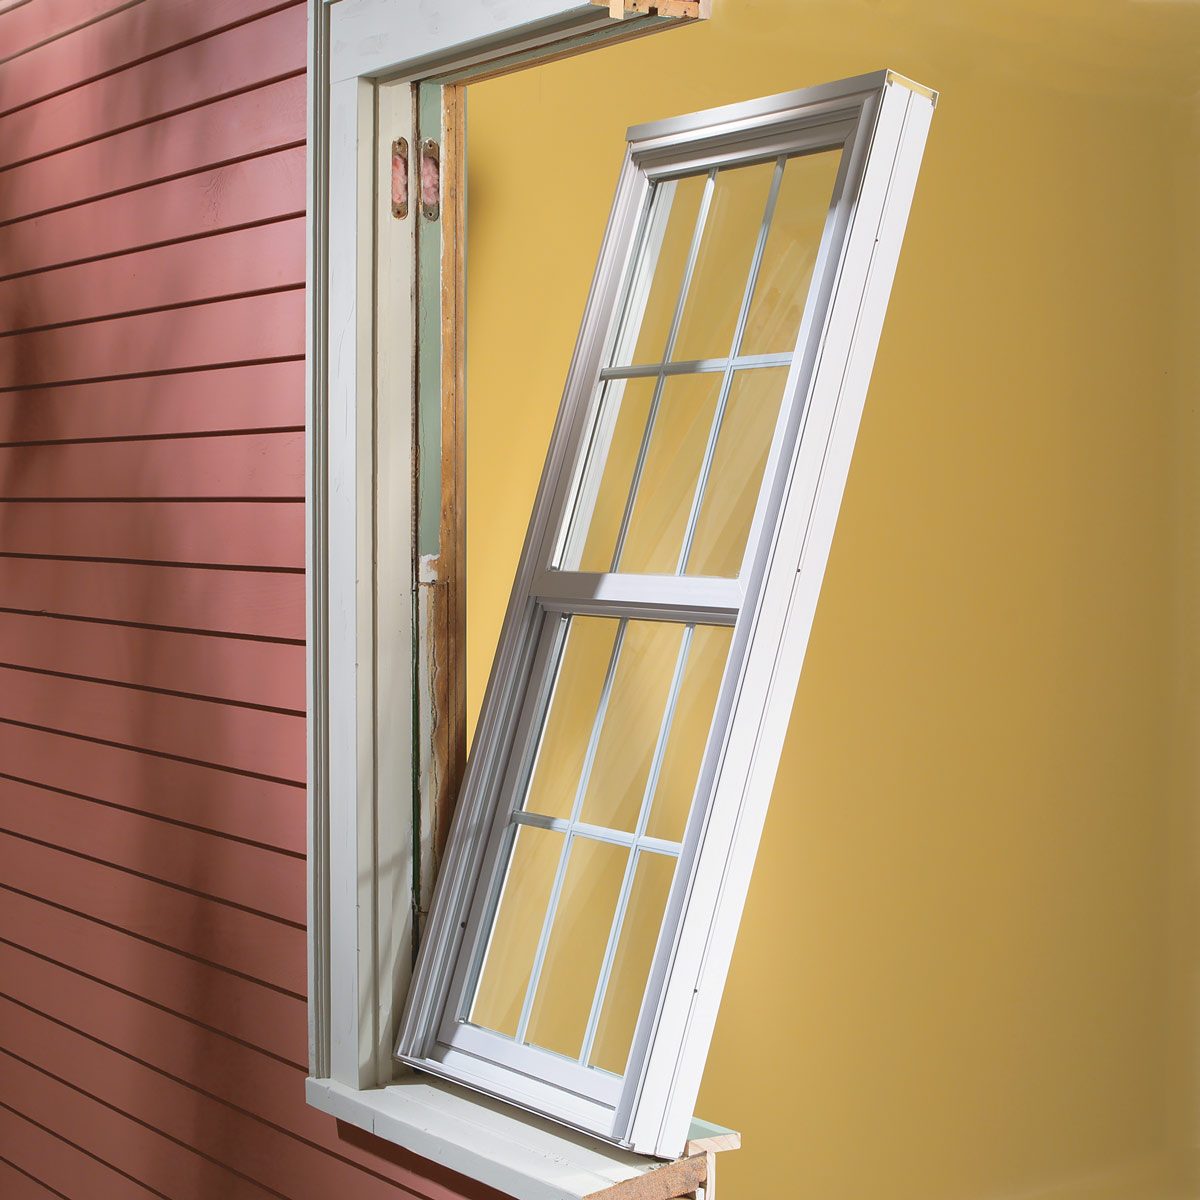
Step 2: Remove the old unit
- Score paint and caulk lines inside and out.
- Pop interior stops or casing. Save them if they are in good shape.
- For insert swaps, pull sash and frame screws. For fin units, unzip siding, cut nails at the fin, and slide the unit out.
- Clean the opening. Remove debris and old foam.
Step 3: Build a sill pan
- Cut flexible flashing to form a pan that wraps up the sides and out over the face.
- Pre-fold end dams. Stick the pan down. Press hard into corners.
- Add a back dam with a wood strip or foam to stop inward water flow.
Step 4: Flash the sides and head
- Patch house wrap as needed.
- Add side flashing tabs you can later lap over the fin or frame.
- Install a head flashing strip that will lap over the side strips.
Step 5: Dry-fit and shim
- Set the window in place without sealant. Use shims at the sill.
- Check level, plumb, and square. The reveal should be even.
- Adjust shims so sashes move free.
Step 6: Set and fasten
- For finned units, run a continuous bed of sealant behind the fin. Do not seal the bottom edge if the maker warns against it.
- Set the unit. Press it in. Tack the corners first.
- Drive fasteners in the slots per the maker’s pattern. Do not overdrive. Keep the frame straight.
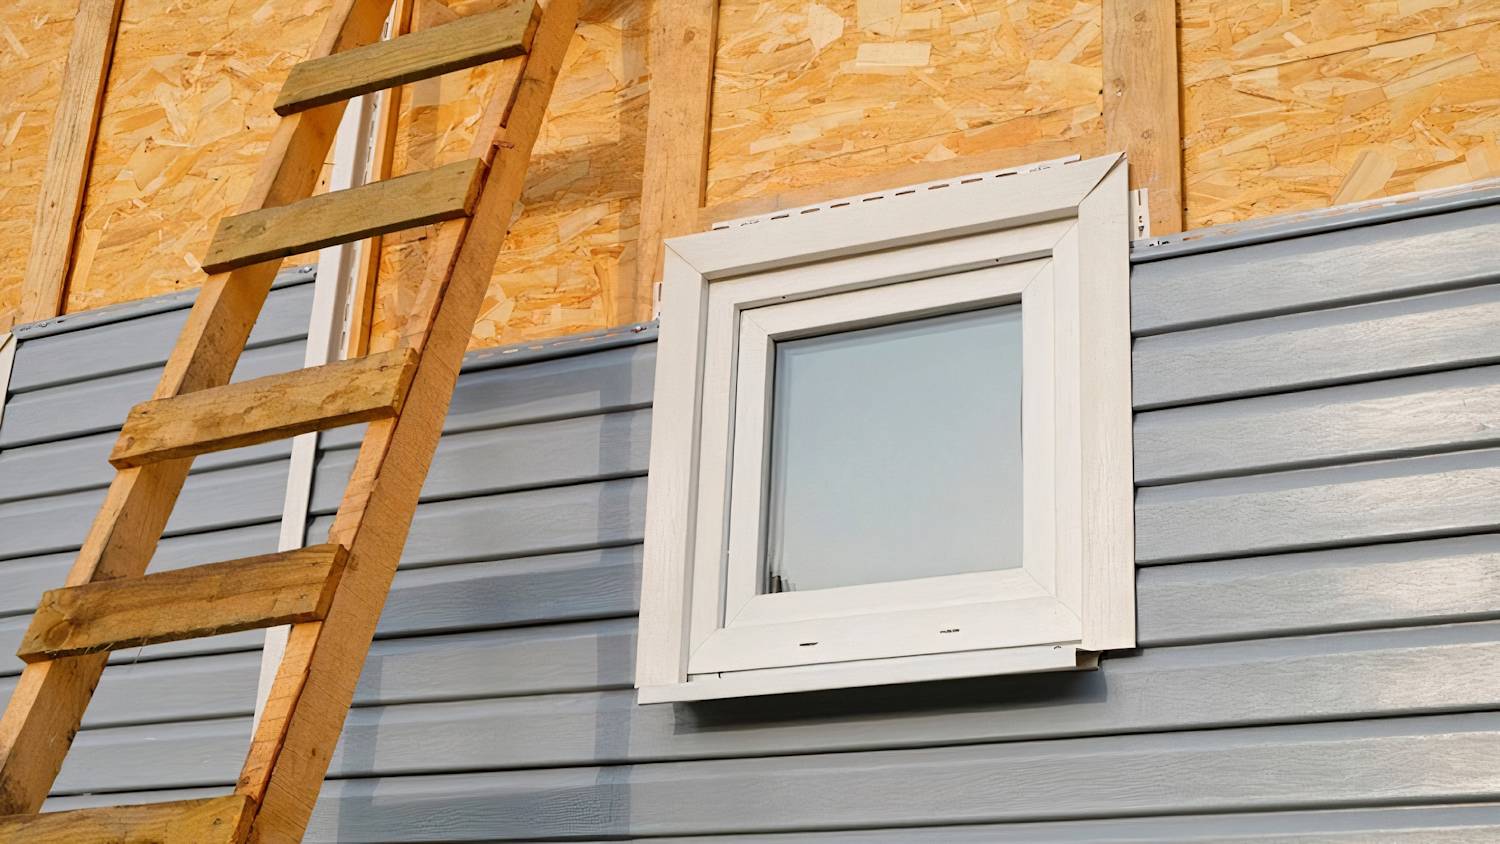
Step 7: Flash the fin
- Flash the fin in this order: sill, sides, then head. Always shingle-lap.
- Add a rigid drip cap over the head if the trim design needs it.
- Tape the top to the house wrap. Let the bottom drain.
Step 8: Insulate and seal inside
- Fill the gap with low-expansion foam in light passes. Do not overfill.
- Where the gap is wide, use backer rod and sealant.
- Reinstall interior trim. Caulk as needed.
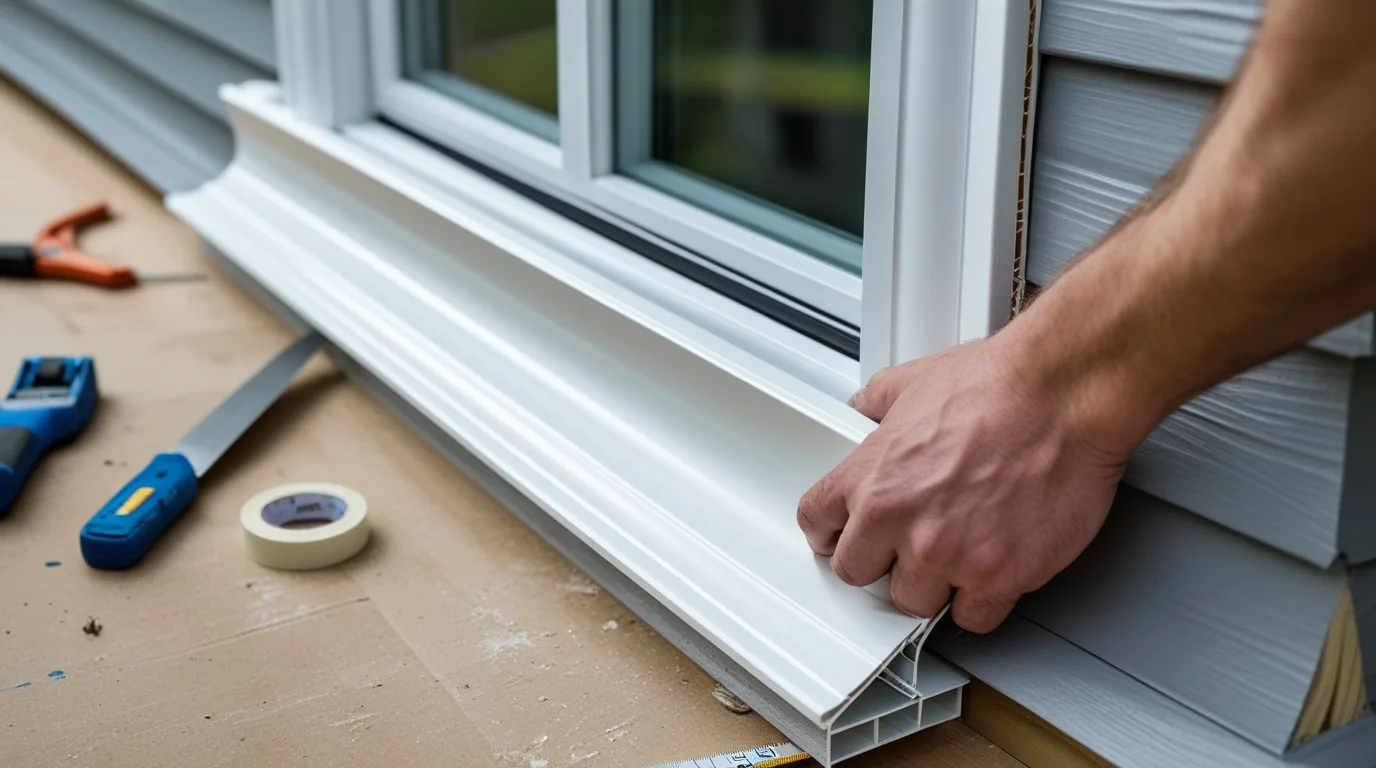
Step 9: Rebuild the exterior trim and siding
- Reset J-channel and PVC trim. Keep a small gap for movement.
- Add color-matched caulk at critical joints, not all over.
- Snap the siding back. Check the coursing lines.
Step 10: Final checks
- Operate sashes and locks. Confirm smooth action.
- Spray water at the head and corners for a quick leak test.
- Clean glass, label, and note the install date for warranty.
This is the core of how to install a replacement window with vinyl siding. Take your time at the sill and head. Water runs by gravity. Your laps must follow that rule.

Flashing, Waterproofing, and Insulation Best Practices
A dry opening is the heart of long life. Many failures come from missed tape laps or foam that warps frames. Follow the maker’s install guide. It aligns with accepted trade practice and code checks.
Water management
- Always build a sill pan. Flexible flashing makes this easy.
- Shingle-lap every layer. Bottom first, then sides, then top.
- Use a drip cap at the head where trim does not cover the fin.
Air and thermal control
- Use low-expansion foam only. It will not bow frames.
- Add backer rod and sealant to large joints.
- Maintain weep paths. Do not block the bottom drainage.
As you learn how to install a replacement window with vinyl siding, remember this: seal where air moves, but let water out at the bottom. That simple rule avoids trapped moisture.

Exterior Integration with Vinyl Siding and Trim
Vinyl moves with heat and cold. Trim and J-channel must allow that slip. A tight joint looks clean on day one but can buckle in July.
Trim details that last
- Leave a small gap between trim and accessories. Fill with flexible sealant only where the maker allows.
- Keep fasteners in the nail slots, not tight. Allow float.
- Use color-matched accessories so the job looks factory.
Water-first layout
- Run the drip cap first, then head trim, then side trim.
- Lap J-channel so upper legs shed over lower legs.
- Use a small bead of sealant at the top corners where wind drives rain.
These habits define how to install a replacement window with vinyl siding that blends in and stays straight for years.

Interior Finish and Energy Performance Tuning
The inside finish is where comfort meets craft. A small air leak can undo the gains of low-e glass. Aim for a tight, even seal, and a neat look.
Steps inside
- Check reveals around the sash. Adjust shims until gaps are even.
- Use foam in two light passes. Trim cured foam flush.
- Reinstall casing. Set nails. Caulk and touch up paint.
Performance checks
- Close and lock the sash. Locks pull the frame tight.
- Use a smoke pencil on a windy day to spot leaks.
- If you feel air, add backer rod and sealant at the edge.
These steps round out how to install a replacement window with vinyl siding for both beauty and savings.
Common Mistakes and How to Fix Them
Even careful DIYers slip here. The good news is most errors have simple fixes. I learned these the hard way on a wet coastal job years ago.
Frequent issues
- Over-foaming that bows the frame. Fix by releasing trim, cutting foam, and re-shimming.
- Skipping the sill pan. If discovered early, pull the unit and add one. If late, add a surface pan and improve head flashing.
- Tight vinyl trim joints. Open the joints, re-cut with gaps, and caulk only where advised.
- Fasteners overdriven through the fin. Back them out and add new ones near the slot center.
If you remember one tip about how to install a replacement window with vinyl siding, it is this: slow down at the water laps. A clean lap beats any bead of caulk.

Safety, Codes, and Warranty Considerations
Safety and rules matter. Window openings can be fall hazards. Electrical lines often run near openings. Codes guide egress size and tough glass in wet zones.
Do it right and safe
- Wear eye and hand protection. Use stable ladders.
- Check for wires and plumbing before you cut.
- Follow local code for bedrooms, stairs, and bath glass.
Warranty basics
- Read the maker’s install guide. Keep receipts and labels.
- Use approved fasteners and sealants.
- Take dated photos of flashing steps.
This keeps your work aligned with how to install a replacement window with vinyl siding that passes inspection and keeps the warranty intact.
Cost, Time, and Project Planning
Plan the job like a small project. Good planning lowers cost and stress. It also helps you stage tools and reduce trips to the store.
What to expect
- Time per window. About 2 to 4 hours for an insert. Four to six hours for a fin unit with siding work.
- Cost per window. Materials often range from a few hundred dollars to over a thousand, based on size and glass.
- Hidden repairs. Set aside a small fund for rot or insect damage.
Schedule tips
- Start with a back window to refine your method.
- Do one full window start to finish before opening the next.
- Keep a rain plan and a way to cover the opening at night.
Budget and time set the tone for how to install a replacement window with vinyl siding without delays.
Quick Answers While You Work
These short hits cover common points you will likely face on site. They keep you moving when a detail stalls you.
Can I install an insert in a damaged wood frame
Yes, but it is not wise. Fix or replace rotten or warped parts first so the new unit seals and operates well.
Do I need to remove vinyl siding for every replacement
Not always. Inserts often install from inside. For fin units or water issues, unzip siding to expose the sheathing and flash right.
What sealant should I use
Use a high-quality exterior sealant that stays flexible and is paintable. Check that it bonds to PVC, aluminum, and vinyl.
Should I caulk the bottom flange
Usually no. Many makers want the bottom open so water can drain. Follow the printed guide for your window.
How do I keep the frame from bowing when I foam
Use low-expansion foam in light passes. Wait between passes and watch the frame for movement.
These are fast reminders within how to install a replacement window with vinyl siding that hold up under pressure.
Real-World Tips From the Field
Over the years, I have learned what saves time and what avoids leaks. These notes come from jobs in hot, cold, wet, and windy zones.
Lessons learned
- Build the sill pan first every time. It is cheap insurance.
- Pre-cut all flashing strips and label them. The install flows better.
- Keep a small offcut of J-channel to test fit around trim.
Mistakes to avoid
- Do not force a square frame into a racked opening. Shim the opening first.
- Do not seal every exterior gap. Leave weep paths at the bottom.
- Do not skimp on backer rod. It makes sealant joints last longer.
These small steps lift the quality of how to install a replacement window with vinyl siding from good to great.
Troubleshooting: Drafts, Leaks, and Stuck Sashes
If something feels off, check simple things first. Most issues trace to one of three spots.
Drafts
- Check lock engagement. Locks pull frames tight.
- Foam gaps that you missed. Add foam or backer rod and sealant.
Leaks
- Look at head laps. Water often sneaks at the top corners.
- Confirm the sill pan sheds out and is not blocked.
Stuck sashes
- Check for racked frames. Re-shim and loosen fasteners, then re-tighten in balance.
- Look for foam bulges. Trim cured foam off the frame.
Use these checks to tune how to install a replacement window with vinyl siding after day one.
Frequently Asked Questions of how to install a replacement window with vinyl siding
What is the difference between insert and full-frame replacement
An insert keeps the old frame and fits a new unit inside it. A full-frame replacement removes everything to the studs and allows full flashing and insulation.
Do I need a permit for a replacement window
Often yes, especially if you change the size or egress. Call your local building office to confirm before you start work.
How do I measure for a replacement window
Measure width and height in three places and use the smallest. Check diagonals to confirm the opening is square and note sill slope.
What kind of foam should I use around windows
Use low-expansion foam made for windows and doors. It will not bow the frame and seals air leaks well.
Can I reuse existing vinyl trim and J-channel
Sometimes, if they are in good shape and match the new depth. If they are brittle or cracked, replace them for a clean, durable finish.
Conclusion
You now have a clear path from first measure to final bead. Focus on a solid sill pan, careful flashing laps, gentle foam, and neat trim. That is the core of how to install a replacement window with vinyl siding that resists leaks and looks great.
Pick one window and try the process. Take photos and notes so each next unit goes faster. If this guide helped, share it, subscribe for more pro how-tos, or leave a comment with your challenge and I will help you solve it.