
Bend precise siding corners on a metal brake by measuring, marking, making relief cuts, and folding carefully.
I have spent years fabricating trim and siding parts for homes and commercial jobs. In this guide I explain how to make siding corners on a metal brake with clear steps, practical tips, and real-world mistakes to avoid. You will get tool lists, step-by-step bending instructions, measurements for common corners, troubleshooting advice, and simple examples you can follow on your first try. Read on to learn proven methods for making clean, strong siding corners on a metal brake with minimal waste and rework.
Why use a metal brake for siding corners
A metal brake makes straight, repeatable bends fast. It keeps corners square and smooth. When you know how to make siding corners on a metal brake, you cut install time and reduce errors.
Benefits:
- Faster production of matching corner pieces.
- Better consistency than hand-bending.
- Cleaner edges and less need for touch-up.
Common uses:
- Outside corner trim for vinyl or metal siding.
- Inside corner flashing to keep moisture out.
- Custom corner caps for trim and soffit.

Source: wikihow.com
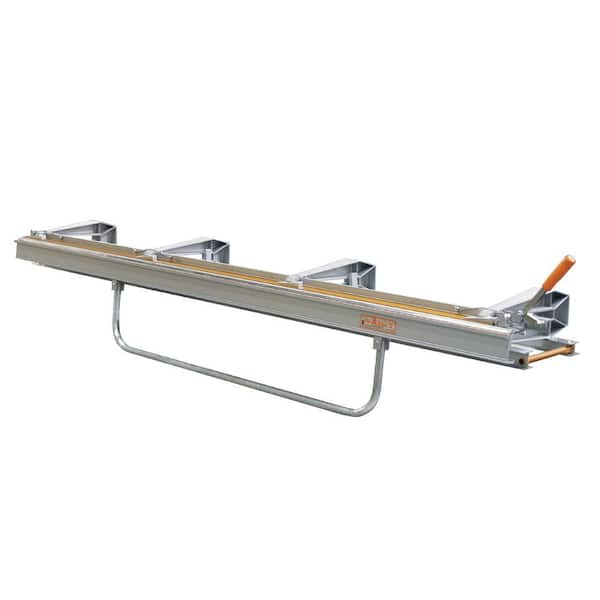
Tools and materials you need
You do not need a huge shop to start. A basic list covers most siding corner jobs.
Essential tools:
- Metal brake sized to your material length.
- Tin snips and aviation snips for cutting.
- Tape measure and square for layout.
- Permanent marker or scribe for lines.
- Center punch and drill for holes if needed.
- Rubber mallet and block to seat bends.
Materials:
- Coil or sheet metal for your siding corners.
- Screws and fasteners rated for siding.
- Roofing cement or sealant for waterproofing.
- Edge guard or finger guard for safety.
Optional but helpful:
- Hemming tool to fold raw edges.
- Hand seamers for small adjustments.
- Relief cut jig for tight corners.

Source: lopcocontracting.com
Step-by-step: How to make siding corners on a metal brake
This section walks through a standard outside 90-degree corner. I repeat practical checks I use on the job. Follow simple steps and work slowly on the first piece.
- Measure and mark
- Measure the corner height and projection on the wall.
- Transfer marks to the metal. Allow for hems and overlap.
- Mark exact bend lines with a scribe or fine marker.
- Cut the blank
- Cut the metal to length with snips or a shear.
- Score and break if the sheet is large.
- Deburr edges to avoid cuts when handling.
- Layout bend lines for the brake
- Decide the flange widths for each side of the corner.
- Mark the bend line at the center of the brake’s clamp.
- For a 1-inch return, mark 1 inch plus hem allowance on each side.
- Make relief cuts if needed
- For tight outside corners, cut relief slots at the corner joint.
- Keep relief cuts narrow and file to remove burrs.
- Relief cuts prevent buckling and cracking on the bend.
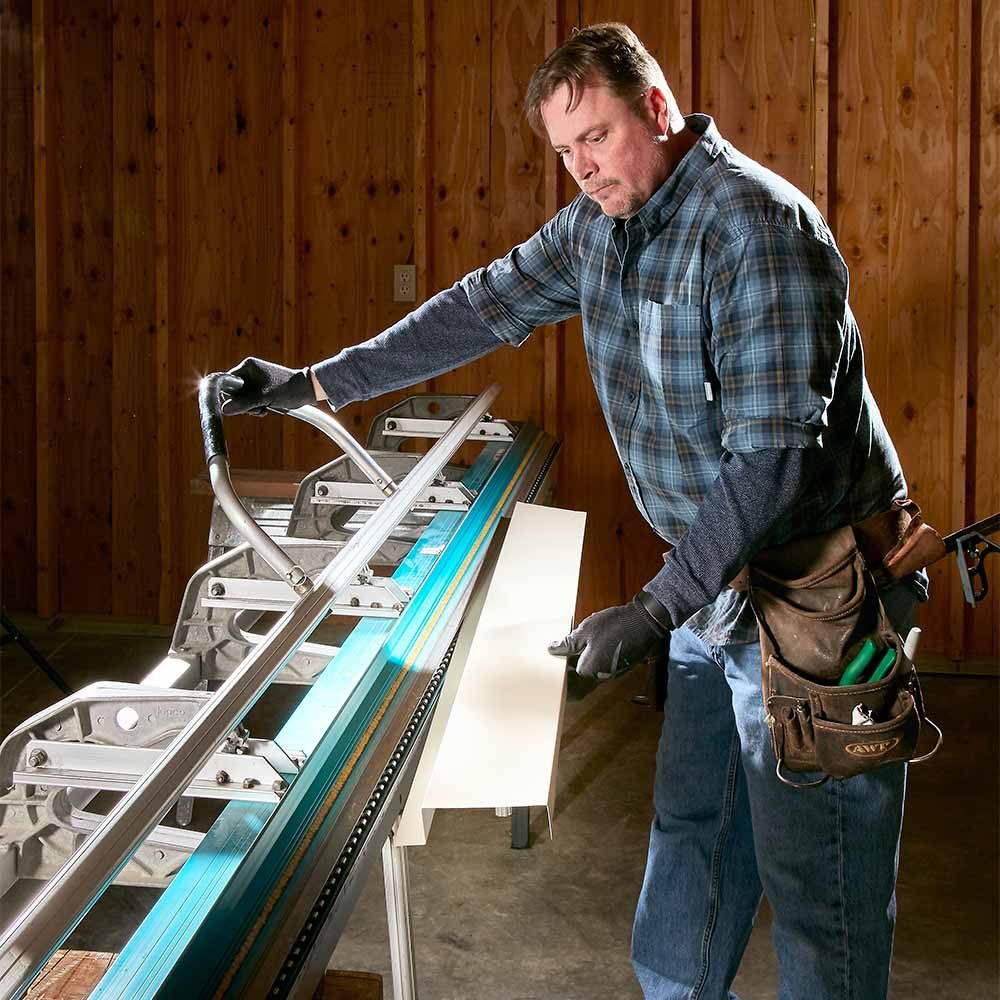
- Set up the brake
- Adjust the brake for material thickness to limit springback.
- If the brake has a bar or top clamp, set it to hold without marring.
- Align the bend line at the brake’s edge.
- Bend the first flange
- Close the brake slowly to the desired angle, typically 90 degrees.
- Open and check the angle with a square.
- Correct slight errors with a rubber mallet or hand seamer.
- Bend the second flange
- Reposition the part so the second bend line aligns with the brake.
- Make the second bend, keeping the part square and even.
- If you need a tight corner, do two small bends rather than one large fold.
- Hem and finish
- Hem edges to remove sharp cut edges if required.
- Add sealant in the corner or a strip of weatherproof tape.
- Drill fastener holes as needed and install with proper screws.
Personal tip from experience:
- Always make a test piece first. I lost time reworking full-length pieces until I learned to test the bend on scrap metal.

Source: wikihow.com
Corner types, measurements, and templates
Know the common corner types before you bend. Templates speed layout and reduce errors.
Common corner types:
- Outside 90-degree corner: two flanges folded away from each other.
- Inside 90-degree corner: a lap or miter that fits inside a corner pocket.
- Mitered corner: two parts cut at 45 degrees and joined for a clean seam.
- J-channel corner: uses a J profile to accept siding ends.
Typical measurements:
- 1/2 inch to 2 inch flange widths are common for residential siding.
- Allow 1/4 inch for a hem on exposed edges.
- Overlaps of 1 to 1.5 inches provide good coverage for water shedding.
Template tips:
- Make a cardboard template first for complex trims.
- Transfer template lines to the metal with a scribe.
- Label templates for repeat use.

Source: reddit.com
Common problems and troubleshooting
Problems happen even to pros. Here are quick fixes I use.
Problem: Metal cracks at the bend
- Cause: Too little relief or wrong material temper.
- Fix: Add relief cuts or use a wider radius bend. Use annealed metal for tight corners.
Problem: Corner is too open after bending (springback)
- Cause: Material springback and brake setting.
- Fix: Overbend slightly by 2–5 degrees or tighten brake pressure and recheck.
Problem: Paint chipped at the bend
- Cause: Old paint or sharp edge during bending.
- Fix: Prime and touch-up paint after bending. Use protective tape on the line.
Problem: Buckling on long flanges
- Cause: Poor clamping or uneven pressure in the brake.
- Fix: Bend in stages and use a straightedge to support long flanges.
PAA-style questions:
How do I avoid metal cracking when bending?
Score or add relief cuts near tight bends. Use a larger radius or annealed metal for sharp corners.
What bend angle should I set for siding corners?
Set to 90 degrees for a square corner. Account for springback and overbend slightly when needed.
Can I make mitered corners on a small brake?
Yes, with precise layout and a mitre shear or hand snips. Test a scrap first.

Safety, best practices, and finishing details
Safety and a clean finish matter. Follow these steps for a professional result.
Safety steps:
- Wear gloves and eye protection.
- Keep fingers clear of the clamping bar.
- Use edge guards and magnetic tools to hold small parts.
Best practices:
- Work at a bench with good lighting.
- Label parts to avoid mix-ups.
- Keep scrap area tidy to prevent nicks on finished pieces.
Finishing details:
- Use sealant sparingly to avoid visible bead lines.
- Fasten at recommended spacing for your siding material.
- Touch up paint or coil coat promptly to prevent corrosion.
Source: familyhandyman.com
Frequently Asked Questions of how to make siding corners on a metal brake
How tight should the bend radius be for siding corners?
Use a radius that matches the thickness of your material. Thicker metal needs a larger radius to avoid cracking.
Can I use a metal brake for both inside and outside corners?
Yes. A metal brake handles inside and outside bends. You may need relief cuts and hemming for inside corners.
What metal thickness works best for siding corners?
Common siding metals range from 26 to 29 gauge. Thinner gauges are easier to bend but may need reinforcement.
How do I prevent paint from cracking during bending?
Use taped protection on the bend line and make smooth, steady bends. Touch up with matching paint after shaping.
Do I need special fasteners for bent siding corners?
Use corrosion-resistant screws sized for your siding. Pre-drill holes in hard metals to avoid splitting or buckling.
Conclusion
Making clean siding corners on a metal brake is a skill that saves time and gives a neat finish. Measure carefully, test on scrap, use relief cuts when needed, and adjust for springback. Start with small jobs to build confidence, and soon you will bend consistent corner pieces that fit and last. Try the steps here on a test piece today, subscribe for more metalworking tips, or leave a comment with your project questions.