
The best hammer for siding nails is a 16–20 oz magnetic-face claw.
You want siding that looks straight, lasts long, and doesn’t crack from overdriven nails. I’ve been there—balancing on a ladder, holding a panel with one hand and a nail with the other. The right tool makes that moment calm instead of chaotic. In this guide, I break down what actually works on siding, from a fast coil nailer to handy magnetic hammers for tough angles. If you want clean work, fewer mistakes, and less fatigue, choosing the best hammer for siding nails is the smartest first step.

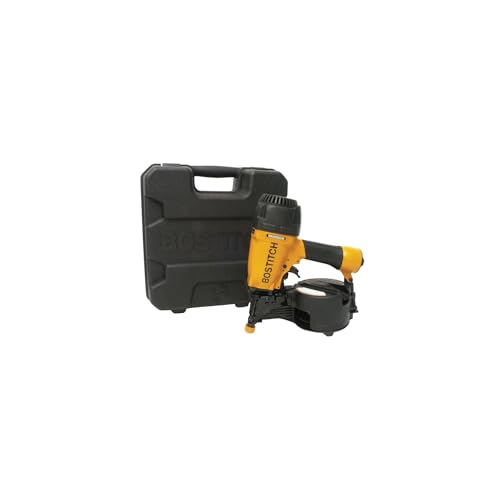
BOSTITCH Coil Siding Nailer, Pneumatic…
The sliding nail gun drives wire weld and plastic inserted coil nails Adjustable depth guide of the siding nailer sets nails to desired depths quickly and conveniently The coil siding…

SEESE Adjustable Nail Puller Hammer:…
Professional woodworkers and DIY enthusiasts—working in tight framing corners or removing stubborn nails from reclaimed wood—know the frustration of a fixed claw hammer that can’t reach or grip properly.The SEESE…
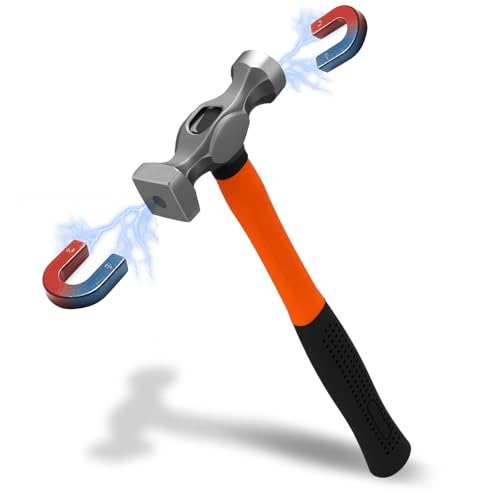
Magnetic Double Head Hammer Forged…
Magnetic Heads for Precise Nail Placement: equipped with two magnetic heads, this hammer securely holds metal cap nails in place, enabling accurate positioning and driving, suitable for roofing, house wrap,…
BOSTITCH N66C Coil Siding Nailer (15°)

If you need to hang a lot of siding fast, a coil siding nailer is hard to beat. The BOSTITCH N66C runs 1-1/4″ to 2-1/2″ 15-degree coil nails, which covers vinyl, fiber cement (with approved nails), and some engineered wood siding. Its depth-of-drive control helps you avoid crushing vinyl panels and lets you fine-tune nail height for clean lines.
This tool saves time and your shoulder. A lightweight magnesium body reduces fatigue on long days. The angled magazine helps in corners and around trim. If you want pro-level speed and consistency for siding nails, this is the “hammer” that turns a weekend job into a one-day win.
Pros:
- Fast, consistent nailing for large siding jobs
- Depth adjustment helps prevent overdriving vinyl
- Handles 1-1/4″ to 2-1/2″ 15° coil nails for flexibility
- Light magnesium body reduces fatigue
- Angled magazine improves access in tight spaces
- Tool-free adjustments help speed setup on site
Cons:
- Requires an air compressor and hose
- Overkill for small patch work or a few repairs
- Higher upfront cost than a manual hammer
My Recommendation
The N66C is ideal if you plan to install a full house of siding or do frequent projects. It delivers control and speed, which matters when each nail must sit just right. If you want the best hammer for siding nails in the “fast and flawless” category, this nailer earns that spot. It helps keep vinyl from buckling and fiber cement from chipping, thanks to precise depth control. For pros or serious DIYers who value time and finish quality, it’s a great choice. Availability is strong, and parts and nails are easy to source.
| Best for | Why |
|---|---|
| Full-house siding installs | Fast, consistent depth and speed across big areas |
| Vinyl and fiber cement projects | Depth-of-drive prevents crushed vinyl and face chips |
| Pros and advanced DIYers | Reliable performance and broad nail size support |
SEESE Adjustable Claw Hammer with Nail Puller
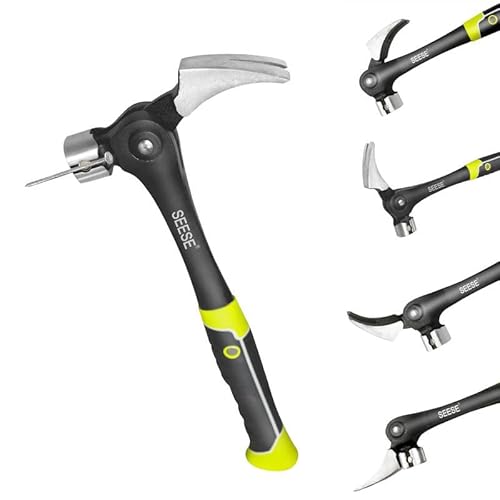
This SEESE hammer stands out for siding work thanks to its magnetic nail starter and an adjustable nail puller head. The magnet lets you start nails one-handed, which is a gift when you’re holding a panel or J-channel. The anti-slip, shock-absorbing handle helps keep your swing steady and your wrist happier by day’s end.
The adjustable puller head gives you options when you must remove a proud or bent nail without marring the wall. For small siding sections, repairs, and trim around windows, this hammer checks a lot of boxes. If you prefer manual control, this is a strong pick for best hammer for siding nails when speed and accuracy live side by side.
Pros:
- Magnetic nail starter helps one-handed starts
- Adjustable nail puller saves trim and panels
- Comfortable, shock-absorbing handle
- Solid claw leverage for tough pulls
- Good balance for controlled, light taps on vinyl
- Works well for tight spots around trim
Cons:
- Not as fast as a coil nailer on big jobs
- Heavier than ultra-light hammers
- Adjustable head adds moving parts to maintain
My Recommendation
If you focus on small-to-medium siding tasks, repairs, or trim, choose this. The magnetic starter is a lifesaver when you need to hit studs without bruising panels. I consider it one of the best hammer for siding nails for careful, hands-on work. It shines when you need to pull a mistake cleanly and reset without damage. Its handle comfort and nail control help reduce dings and dents. For budget, quality, and everyday usability, it’s a solid, widely available option.
| Best for | Why |
|---|---|
| Repair and punch list work | Magnetic starts and easy nail removal |
| Vinyl trim around openings | Soft strikes and precise placement |
| DIY homeowners | Comfort grip and versatile claw functions |
Magnetic Double-Head Hammer for Siding & Roofing

Two heads. One mission: make awkward nailing easier. This forged steel, double-head hammer uses a strong magnet to hold nails as you reach over house wrap, into tight corners, or under eaves. It’s a clever choice when you want a compact tool that helps place siding nails with fewer drops and fewer finger hits.
The magnetic channel helps you start nails fast when only one hand is free. The second head offers a different striking face for tapping, setting, or adjusting. For small siding installs, patches, and punch work, it’s handy. If you value finesse over brute force, this could be your best hammer for siding nails in hard-to-reach spots.
Pros:
- Strong magnet reduces dropped nails
- Double heads add versatility for taps or sets
- Compact shape fits tight spaces and angles
- Forged steel head for durability
- Great for overhead and ladder work
- Useful on roofing and drywall too
Cons:
- Not ideal for heavy, all-day driving
- Less leverage than full-size hammers
- Magnet can collect metal shavings over time
My Recommendation
I reach for this when I have to drive a few siding nails in a tight corner. The magnet keeps starts steady, and the compact size cuts fatigue on ladders. It’s one of the best hammer for siding nails when space is limited or precision matters more than power. Use it to start nails cleanly and finish with a few light taps. For its price and utility, it adds real value to any siding tool kit.
| Best for | Why |
|---|---|
| Tight spaces and corners | Compact head and magnetic starts |
| Overhead nailing | Reduces dropped nails and strain |
| Multi-trade use | Works across siding, roofing, drywall |
KURUI 8oz Hammer + 700-Pc Nails Kit

This set bundles a lightweight 8oz hammer with a 700-piece nails kit. It’s great for light-duty tasks, picture hanging, and small household fixes. For siding-specific work, I see it as a support tool, not the primary driver. The hammer is too light for routine siding nails, but it can help with trim and gentle taps.
The nail assortment offers roofing/wall nails and finishing nails. You’ll still want hot-dipped galvanized or stainless siding nails for exterior use. Think of this as a handy starter or backup kit. Keep it nearby for small fixes, then switch to a heavier, magnetic-face hammer for your siding panels.
Pros:
- Budget-friendly bundle with lots of nails
- Lightweight hammer for light taps and trim
- Great backup or emergency kit
- Compact, easy to store in a toolbox
- Useful across many home tasks
Cons:
- 8oz hammer is too light for most siding nails
- Nail mix may not match exterior corrosion needs
- Not designed for heavy outdoor projects
My Recommendation
Buy this as a support kit rather than your main siding tool. It’s useful when you need to nudge trim into place or drive small nails without damage. For anyone building a budget tool set, it earns a spot. But for the best hammer for siding nails, pick a 16–20 oz magnetic-face hammer or a siding nailer for the big work. Keep this kit for light trim, marking, and small tasks. It adds value by being ready when you need quick fixes.
| Best for | Why |
|---|---|
| Light trim and touch-ups | Gentle taps without crushing material |
| Starter tool kits | Includes nails for various small jobs |
| Budget buyers | Low price and versatile household use |
CROM Trim Nail Punch (Pocket Driver)
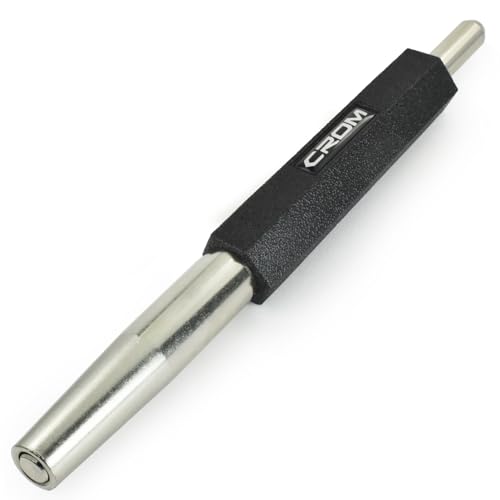
This pocket-size trim nail punch protects your fingers while driving small trim nails. It’s not a hammer, but it pairs well with one for siding-related trim tasks. Slide a trim nail into the tool, hold it safely, and strike the punch with your hammer. It’s ideal when working near delicate surfaces where a slip could leave a mark.
I like it for finishing touches around windows, fascia trim, or interior casing near siding transitions. The compact body fits in a pocket and speeds careful work. Use it to place nails precisely, then finish with light hammer taps. For anyone nervous about smashed fingers, this tool pays for itself fast.
Pros:
- Protects fingers from mis-hits
- Great for small trim nails and delicate work
- Pocket size for easy carry
- Improves precision in tight spots
- Pairs with any hammer you own
Cons:
- Not a substitute for a hammer
- Limited to small trim nails
- Slower than freehand once you’re very skilled
My Recommendation
If you install trim around siding or do detail work, add this to your kit. It reduces finger risk and helps you set nails exactly where you want them. I’d still call a magnetic-face 16–20 oz claw the best hammer for siding nails for most tasks. But this punch is a smart sidekick. For precise, clean results on trim, it’s worth it and easy to find.
| Best for | Why |
|---|---|
| Trim near finished surfaces | Protects materials and fingers |
| Tight corners and narrow reveals | Precise nail placement without slips |
| DIYers improving accuracy | Confidence boost while learning control |
How to choose the best hammer for siding nails
Picking the right tool saves time, sweat, and panels. I’ve learned that a few key features matter more than brand names. Use these factors to dial in your choice and reduce mistakes.
- Weight and balance: Aim for 16–20 oz for most siding nails. That weight drives nails cleanly without extra swings. Balance matters more than raw weight. A well-balanced hammer feels lighter and hits straighter.
- Magnetic nail starter: A magnet in the face or slot is gold for siding. It lets you start a nail with one hand while holding the panel with the other. It also reduces finger hits and crooked starts.
- Face style: A smooth face is gentle on vinyl. A lightly milled face can help prevent glancing blows but may scuff soft siding. If in doubt, choose smooth and strike square.
- Handle comfort: Shock-absorbing grips save your wrist and elbow. Look for anti-slip handles that keep control in hot, sweaty conditions. Comfort equals consistency over a long day.
- Claw design: A good claw removes mistakes cleanly. Curved claws add leverage. An adjustable nail puller head, like on the SEESE, helps avoid damage to siding and trim.
- Durability: Forged steel heads last. Some hammers add anti-rust coatings. Solid fit between head and handle prevents wiggle and wasted energy.
- Depth control (for nailers): If you go pneumatic, depth-of-drive is critical. It keeps vinyl from crushing and fiber cement from surface chips. Always test on scrap before full panels.
When people ask me what’s the best hammer for siding nails, I start with use case. Are you hanging hundreds of panels or fixing five? For big jobs, a 15° coil siding nailer like the N66C wins for speed and consistency. For everyday repairs, a magnetic-face 16–20 oz claw hammer offers control and ease. Both paths get you neat lines and fewer callbacks.
Manual hammer vs. coil siding nailer
Both routes work. Your project size and comfort decide the winner. I use a nailer for walls of panels and a hammer for details and fixes.
- Speed: Nailers rule speed. A coil nailer fires fast and keeps depth tight. Manual hammers are slower but fine for small runs.
- Control: Hammers shine for delicate vinyl taps and trim. With skill, you can place every nail dead-on and leave the perfect gap.
- Cost: A hammer costs far less. A nailer plus compressor is a bigger investment. If you install siding often, it pays back in time saved.
- Access: Hammers slip into tight corners and under eaves better. Some nailers struggle in cramped angles, though a 15° magazine helps.
For most homeowners, the best hammer for siding nails is a magnetic-face 16–20 oz claw. For large installs, the best “hammer” is a depth-adjustable coil siding nailer. You can even mix both: use the nailer for fields and the hammer for edges and tricky cuts.
Technique tips for siding nailing
Good tools are only half the battle. Technique keeps siding straight and stress-free. Here are simple tips I live by.
- Hit studs: Use a stud finder or measure layout. Siding nails should bite into framing for holding power and clean lines.
- Leave room to move: Vinyl expands and contracts. Drive nails so the head sits snug but not crushed. You should be able to slide the panel side-to-side.
- Use the right nails: Exterior work needs corrosion resistance. Use hot-dipped galvanized or stainless steel siding nails with proper length and shank type.
- Start square: Level your starter strip. Every row builds on it. A square start saves hours of “chasing” level later.
- Test depth: If you use a nailer, test on scrap first. Adjust depth until heads sit right without dimpling the surface.
- Protect finishes: On delicate trim, use a nail punch for safe, small taps. Tools like the CROM punch keep your fingers and finishes safe.
Follow the manufacturer’s install guide for your exact siding. Every brand has small rules that protect warranties. Combine those rules with the best hammer for siding nails and you’ll get pro results.
Safety essentials you should not skip
Safety turns a hard day into a clean day. Simple habits prevent injuries and mistakes. I never skip these basics on a siding job.
- Eye protection: Nails, chips, and dust all fly. Wear safety glasses from start to finish.
- Gloves with grip: Secure hold on panels and tools reduces drops. Thin, grippy gloves improve feel on nails and hammer.
- Hearing protection: Nailers and compressors are loud. Protect your ears so you can work all day.
- Ladder setup: Stable, level footing matters. Keep three points of contact and don’t overreach.
- Check behind walls: Know where wires and pipes run. Use proper fastener length to avoid surprises.
Use common sense and patience. The best hammer for siding nails will help, but safety habits do the heavy lifting for your hands and eyes.
FAQs Of best hammer for siding nails
What weight hammer is best for siding nails?
A 16–20 oz claw hammer works best for siding nails. It offers enough power with control for vinyl and trim.
Should I choose a smooth or milled face for vinyl siding?
Choose a smooth face. It avoids scuffing soft vinyl. Keep strikes square for clean results.
Can I use a roofing hammer for siding?
You can, but it’s not ideal. A magnetic-face claw hammer gives better control and fewer panel marks.
Do I need a coil nailer for a whole house?
It helps a lot. A 15° coil siding nailer speeds work and keeps nail depth consistent across walls.
What nails should I use for exterior siding?
Use hot-dipped galvanized or stainless steel siding nails. Follow your siding brand’s length and shank rules.
Final Verdict: Which Should You Buy?
For speed and perfect depth, get the BOSTITCH N66C. It makes large siding jobs clean and fast.
For hands-on control, I call a 16–20 oz magnetic-face claw the best hammer for siding nails. Add the SEESE for pulls and tight work, and the magnetic double-head for corners.