
Use galvanized ring-shank nails, hit studs, 6-inch edges, 12-inch field, flush heads.
If you want a clean, long-lasting install, you need a clear plan, the right fasteners, and a solid nailing pattern. In this guide, I walk you through how to fasten T1-11 siding the right way, with pro tips I’ve learned on real job sites. You will learn what to use, where to place each nail, and how to seal and flash so your work stands up to weather and time.
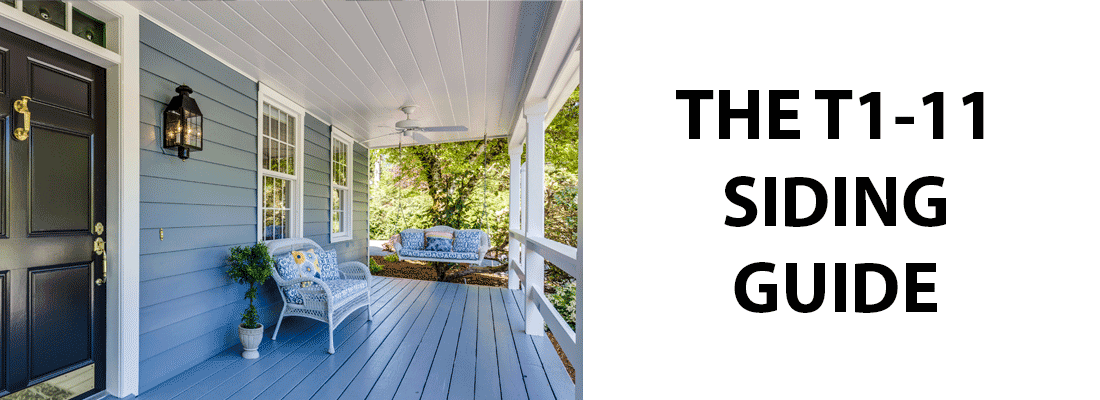
What T1-11 Is and Why Fastening Matters
T1-11 is a plywood or OSB panel with vertical grooves. It can act as siding and, when rated, as structural sheathing. It comes in 4-foot-wide sheets, often 8, 9, or 10 feet long.
Good fastening makes the face look even and keeps water out. It also holds the panel flat against studs. This reduces cupping, buckling, and early paint failure. Done right, it supports wind loads and helps the wall feel solid.
You will see clear steps on how to fasten T1-11 siding using code-backed patterns. I also explain what to do in damp areas, near the coast, and around windows and doors.

Tools and Materials You Need
Gather gear before you lift a panel. This keeps the install smooth and safe.
- Tape measure and chalk line for layout on studs
- 4-foot level or laser for plumb lines
- Circular saw with fine-tooth blade for clean edges
- Hammer or siding nailer with depth control
- Galvanized or stainless ring-shank nails sized for proper penetration
- Exterior-grade screws if allowed by the maker
- Housewrap, flashing tape, and Z-flashing for moisture control
- Primer and exterior paint or stain for edges and faces
- Safety gear such as eye, ear, and dust protection
- Spacers or shims for a uniform base gap at the bottom
If you plan how to fasten T1-11 siding before you cut, you avoid missed studs and blowouts. Simple prep saves a lot of fixes later.
Planning and Prep That Save You Time
Lay out studs with a chalk line on the face of the wrap. Mark window and door centers too. Pre-prime all cut edges. This slows water entry and stops swelling.
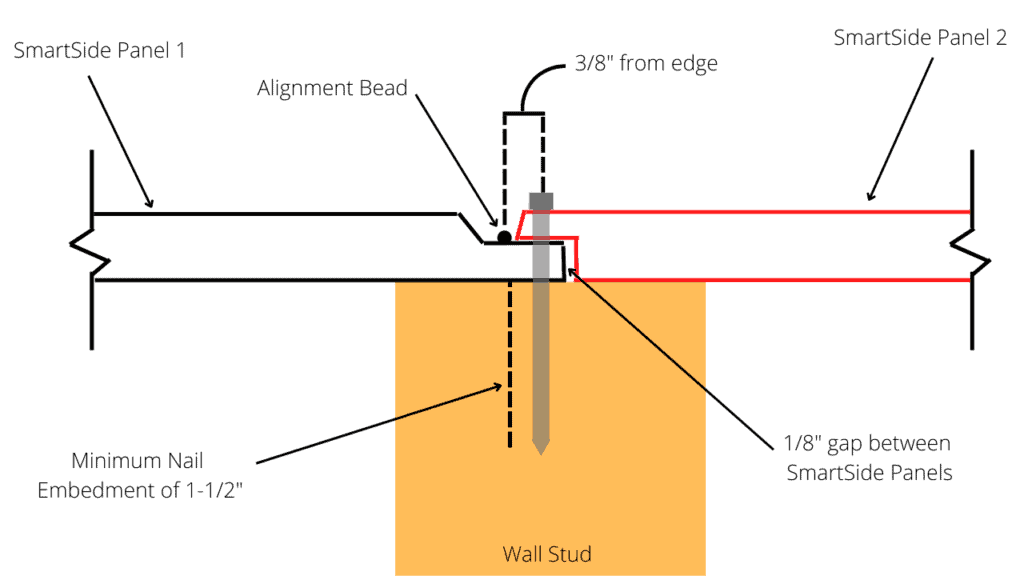
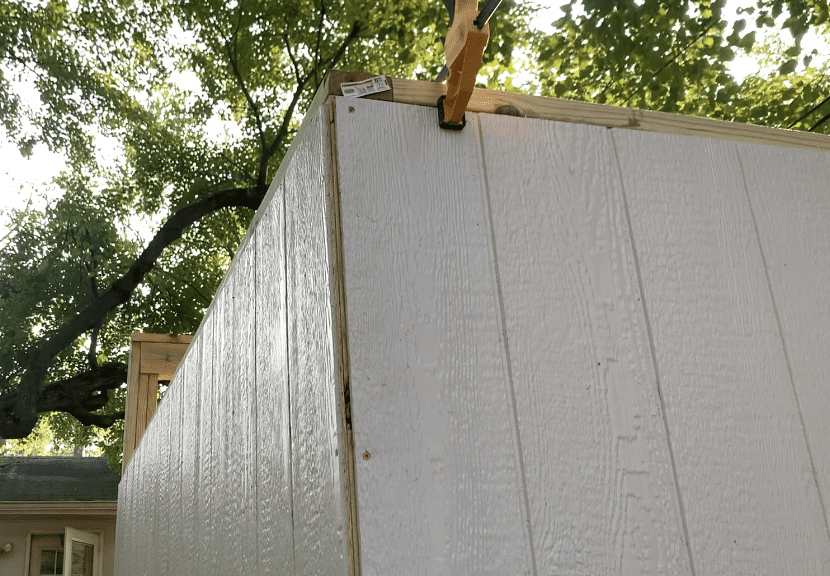
Snap a level line to set the first panel. Keep the bottom edge up off concrete and decks by 1 inch. Use a starter strip to kick water out and away from the wall. Leave a 1/8-inch gap between panels for expansion. Do not drive nails into the grooves.
I have seen jobs fail from skipping simple steps. When you plan how to fasten T1-11 siding, mark every stud and check each panel dry-fit first. You will get tight seams and fewer call-backs.

Step-by-Step: How to Fasten T1-11 Siding
Follow these steps for a clean and code-friendly install.
- Check framing and wrap
- Confirm studs are 16 or 24 inches on center.
- Install housewrap per code. Seal tears with tape.
- Mark stud lines on the wrap with chalk.
- Prep the first panel
- Cut to height. Seal cuts with primer.
- Test fit. Leave a 1-inch base gap above slabs or decks.
- Align the first panel plumb, grooved side out.
- Tack and align
- Put two temporary nails near the top into studs. Do not sink them hard.
- Check plumb with a level. Adjust the bottom with shims if needed.
- Set your nailing pattern
- Edges: 6 inches on center along every panel edge over studs.
- Field: 12 inches on center along studs in the panel field.
- Keep nails at least 3/8 inch from panel edges and off the grooves.
- Drive nails flush. Do not crush the face.
- Work across the wall
- Stagger vertical seams when you can.
- Keep a 1/8-inch gap between panel edges.
- Use Z-flashing over any horizontal joints if you stack panels.
- Seal and finish
- Flash head and side trims at windows and doors.
- Back-prime any fresh cuts.
- Paint or stain with an exterior system as soon as the maker allows.
Quick Q&A you might ask as you work:
- Can I use screws instead of nails? Yes, if the maker allows exterior structural screws with proper length. Use corrosion-resistant screws with bugle heads, and keep them flush.
- Should I caulk vertical panel seams? Many pros skip face caulk and use battens or H-moldings. If you caulk, use high-grade, paintable sealant and follow the maker’s rules.
If you teach a helper how to fasten T1-11 siding, have them call out each stud hit. This builds a rhythm and cuts misses. Good teams install fast and clean.
Fasteners, Sizes, and Nailing Patterns That Work
Pick fasteners for strength and durability. The goal is at least 1.5 inches of penetration into studs after passing through wrap and any sheathing.
-
Nails for most jobs
- 8d hot-dip galvanized ring-shank, about 2 to 2.5 inches long
- Shank diameter near 0.113 inch helps grip
- Use 10d only if thickness and layers need it
-
Coastal or wet zones
- Use stainless steel ring-shank nails
- Avoid electro-galvanized nails; they rust fast
-
Screws
- Use exterior structural screws only if the siding maker allows
- Choose corrosion-resistant, with bugle heads, sized for 1.5-inch stud bite
-
Nailing pattern
- Edges: 6 inches on center
- Field: 12 inches on center over each stud
- Keep nails flush, never countersunk, and off grooves
I have seen panels cup when people used smooth-shank nails. Ring-shank or screws hold far better. When you explain how to fasten T1-11 siding to a new crew, stress nail choice and depth control. That one point prevents most face waves and loose spots.

Flashing, Gaps, and Weatherproofing Details
Water is the real test. A neat nailing job will still fail if gaps and flashings are wrong.
- Leave 1/8 inch between panels for movement
- Keep 1 inch up from concrete or decks, 2 inches above roofs
- Use Z-flashing above horizontal joints and head trim
- Flash windows with pan, jamb, and head tapes in the right order
- Prime all cut edges before install
- Do not caulk the bottom edge; let water drain
When I teach how to fasten T1-11 siding, I show a mock corner and head detail. Once you see the path water wants to take, the flashing order makes sense. Think like rain, and you will build better walls.
Special Cases and Code Notes
Every wall is a little different. Adjust the fastener length and pattern as needed, but stay within code and the panel rating.
-
Over foam or sheathing
- Use longer nails to keep 1.5 inches of stud bite after layers
- Do not rely on foam to hold nails
-
Structural use
- If panels act as shear walls, follow the rated nailing schedule
- Many ratings call for 6-inch edges and 12-inch field, but check the stamp
-
24-inch stud spacing
- Keep 6-inch edges and up to 12-inch field, hitting each stud line
- Watch for face deflection; thicker panels help
-
Seismic and high-wind zones
- Local code may need tighter edge spacing
- Follow the engineer’s or panel maker’s specs
Trusted industry data and common building codes support these rules. When in doubt, read the panel stamp and the install guide. That is part of how to fasten T1-11 siding with confidence.

Troubleshooting and Repairs
Small errors can be fixed if you catch them early.
-
Overdriven fasteners
- Add a new nail 1 inch away, set flush
- Fill the divot and touch up paint
-
Missed studs
- Back out the fastener
- Fill the hole and hit the stud line with a fresh nail
-
Face waves or cupping
- Check for tight gaps or wet edges
- Add proper fasteners and seal cut edges
-
Loose corners
- Add nails at 6 inches on center on both edges
- Reflash if leaks are found
When crews ask me how to fasten T1-11 siding and avoid callbacks, I say this: log misses, fix them at once, and do a slow walk-around before paint. Ten minutes now saves a day later.
Pro Tips and Common Mistakes to Avoid
Use these field-proven tips to boost quality.
-
Prime first
- Pre-prime edges and backs when you can
- Reduces edge swell and paint peel
-
Mind the grooves
- Nail on the high lands, not in the grooves
- This keeps holding power and avoids splits
-
Control depth
- Set nailers so heads sit flush
- Test on scrap before you start
-
Vent and drain
- Do not seal the bottom edge
- Use proper clearances over hard surfaces
-
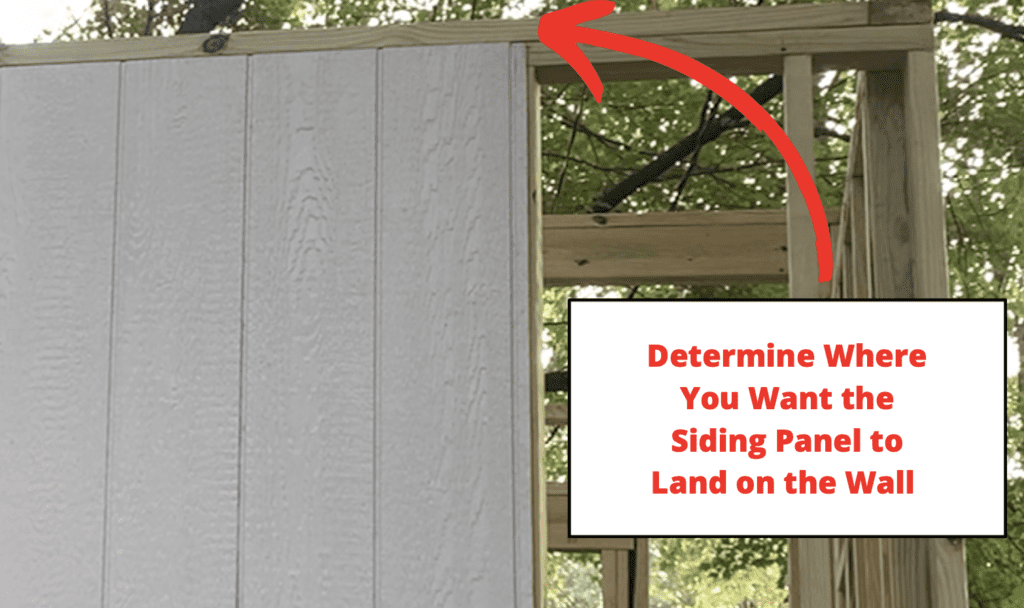
Plan the look
- Start on the most visible corner
- Keep seams square and plumb for a clean face
If you need a quick reminder on how to fasten T1-11 siding, write the edge and field spacing on a scrap by your saw. That small note keeps the whole team on pattern.
Cost, Time, and Project Planning
Good planning sets a real budget and timeline.
-
Labor pace
- One pro and one helper can set 10–14 panels per day on a clear wall
- Cuts, flashings, and ladders slow that down
-
Fastener cost
- Ring-shank nails cost a bit more than smooth
- They are worth it for hold and fewer call-backs
-
Finish
- Prime and paint soon after install per product guide
- Factor dry time into your plan
For owners and builders searching how to fasten T1-11 siding with a sharp budget, buy fasteners in bulk and stage panels near each wall face. You will move faster and waste less effort.
Frequently Asked Questions of how to fasten t1-11 siding
How many nails per sheet do I need?
Most jobs use 6 inches on edges and 12 inches in the field. On a 4×8 panel over 16-inch studs, expect roughly 80–100 nails.
Can I use screws instead of nails for T1-11?
Yes, if the maker allows exterior structural screws. Choose corrosion-resistant screws, and keep heads flush with the face.
Do I need to leave a gap between panels?
Yes, leave about 1/8 inch between panel edges. This allows for movement and helps prevent buckling.
What nail material is best near the coast?
Use stainless steel fasteners near salt air. Inland, hot-dip galvanized ring-shank nails work well.
Should I caulk vertical seams?
Many pros use battens or H-moldings instead of face caulk. If you do caulk, use a top-grade, paintable sealant and follow the maker’s guide.
Can T1-11 act as sheathing and siding?
Yes, if the panel is rated for structural use. Follow the stamped nailing schedule and local code for shear walls.
How high should panels be above concrete?
Keep at least 1 inch above concrete or decks. Maintain 2 inches above roof surfaces.
Is it okay to nail into grooves?
No. Nail on the high, solid lands, not in the grooves. This prevents splits and keeps holding strength.
How to fasten T1-11 siding over foam?
Use longer ring-shank nails to keep 1.5 inches of stud bite after foam thickness. Do not rely on foam to hold fasteners.
Do I need Z-flashing between stacked panels?
Yes, use Z-flashing over horizontal joints. It sheds water and protects the joint from leaks.
Conclusion
You now know how to fasten T1-11 siding in a way that looks sharp and lasts. Use the right fasteners, follow the edge and field pattern, seal cut edges, and install proper flashing. Small details make a big difference.
Set up your tools, mark your studs, and start with one plumb panel. Keep the pattern tight and the heads flush. Ready to get it done? Put these steps to work today, and share your results or questions so we can build even better together.