
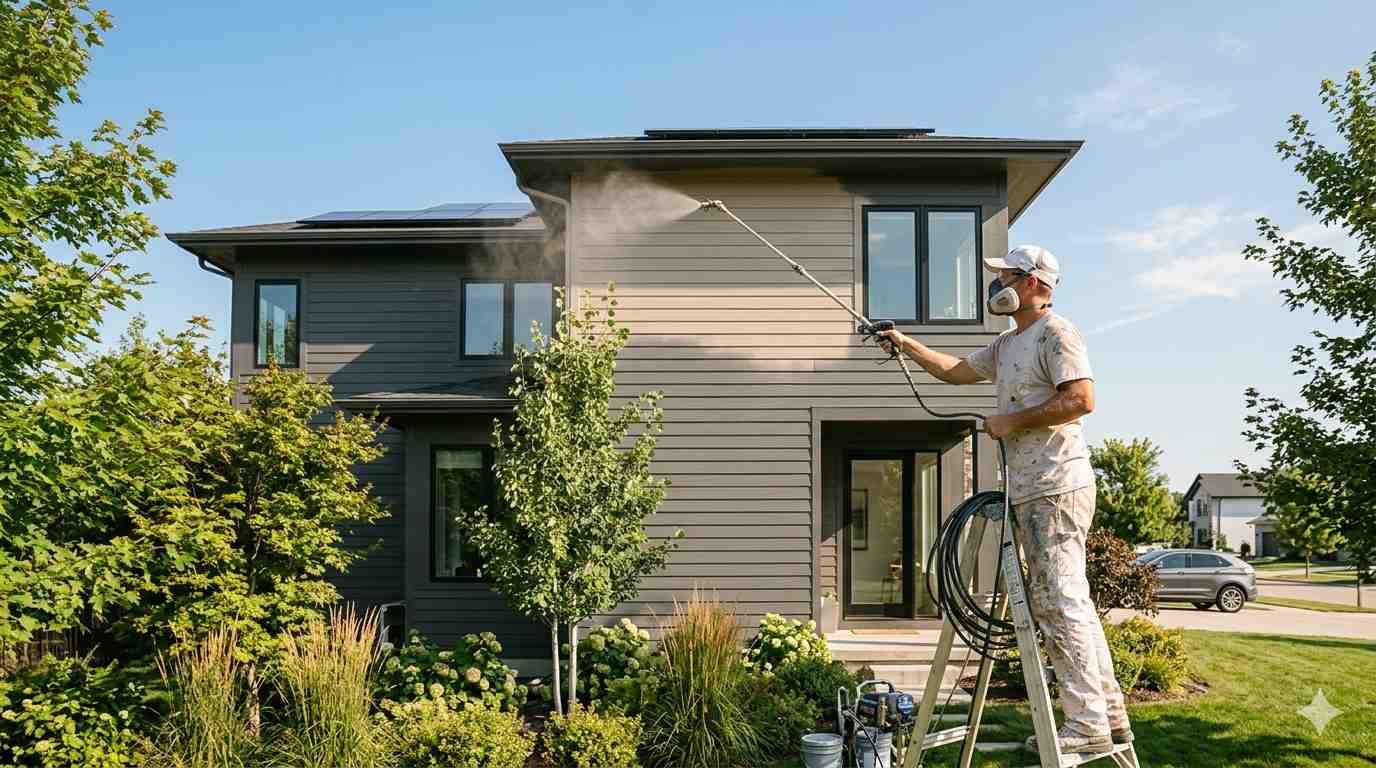
Painting Hardie board siding demands more than standard exterior paint knowledge. This fiber cement surface behaves differently than wood or vinyl. If you follow the right prep, primer selection, and application sequencing, you can achieve a durable, factory-grade finish that lasts 10 to 15 years without premature peeling.
This guide breaks down the exact process for how to paint Hardie board siding, including pro-level insights, failure prevention, and cost control strategies.
To paint Hardie board siding: Clean with TSP and a pressure washer under 3,000 PSI. Scuff-sand glossy areas with 120-grit paper. Apply one coat of alkali-resistant acrylic primer using a spray-and-back-roll method. Apply two thin topcoats of 100% acrylic latex masonry paint. Maintain surface temperature between 50°F and 85°F. Allow 24 hours of dry time before rain exposure.
Tools & Materials for How to Paint Hardie Board Siding
| Category | Item | Specifications & Variations |
|---|---|---|
| Paint | 100% acrylic latex | Formulated for masonry/fiber cement. Sherwin-Williams Duration or Benjamin Moore Aura. Add mildewcide in humid climates. |
| Primer | Alkali-resistant acrylic | High-bonding formula to neutralize cement pH. |
| Sprayer | Airless paint sprayer | Graco or similar. Tip size: .015 to .019 inch. Essential for houses over 1,500 sq. ft. |
| Brushes | Angled sash brush | 2.5-inch nylon/polyester blend. |
| Rollers | Masonry roller cover | 3/8-inch nap. Designed for textured surfaces. |
| Caulk | Elastomeric sealant | Polyurethane or siliconeized acrylic. Must remain flexible. |
| Cleaner | TSP (trisodium phosphate) | Heavy-duty degreaser and surface prep. |
| Abrasives | Sandpaper | 120-grit for scuff-sanding. |
| Safety | Respirator | N100 or P100 rated. Required for silica dust protection. |
| Prep Tools | Pressure washer, tape, plastic | Pressure washer rated under 3,000 PSI. |
Preparation Phase for Painting Hardie Board Siding
Preparation determines 80 percent of your paint job’s longevity. Rushing this phase guarantees premature failure regardless of paint quality.
Inspection: Walk the entire perimeter and examine every board. Look for popped nails—these will rust through paint within months. Sink any protruding fasteners and seal each nail head with elastomeric caulk. Inspect all butt joints where two boards meet vertically. These seams are the most common failure points. If existing caulk shows cracks or gaps, remove it completely and reapply fresh elastomeric sealant. Check for any cracked boards; fiber cement cracks typically indicate improper installation or impact damage. Replace cracked boards before painting.
Surface Readiness: Clean the siding using a pressure washer with a 40-degree fan tip. Keep pressure below 3,000 PSI—higher pressure forces water behind the seams and into the wall cavity. Apply a TSP solution from the bottom of each wall upward to prevent streaking. Let the solution dwell for 10 minutes, then rinse from the top down. For stubborn mildew or algae, scrub manually with a soft brush. After cleaning, test the surface by spraying water. If water beads up, the surface still has a gloss coating. Scuff-sand all glossy areas with 120-grit sandpaper. This creates microscopic scratches that give primer something to grip.
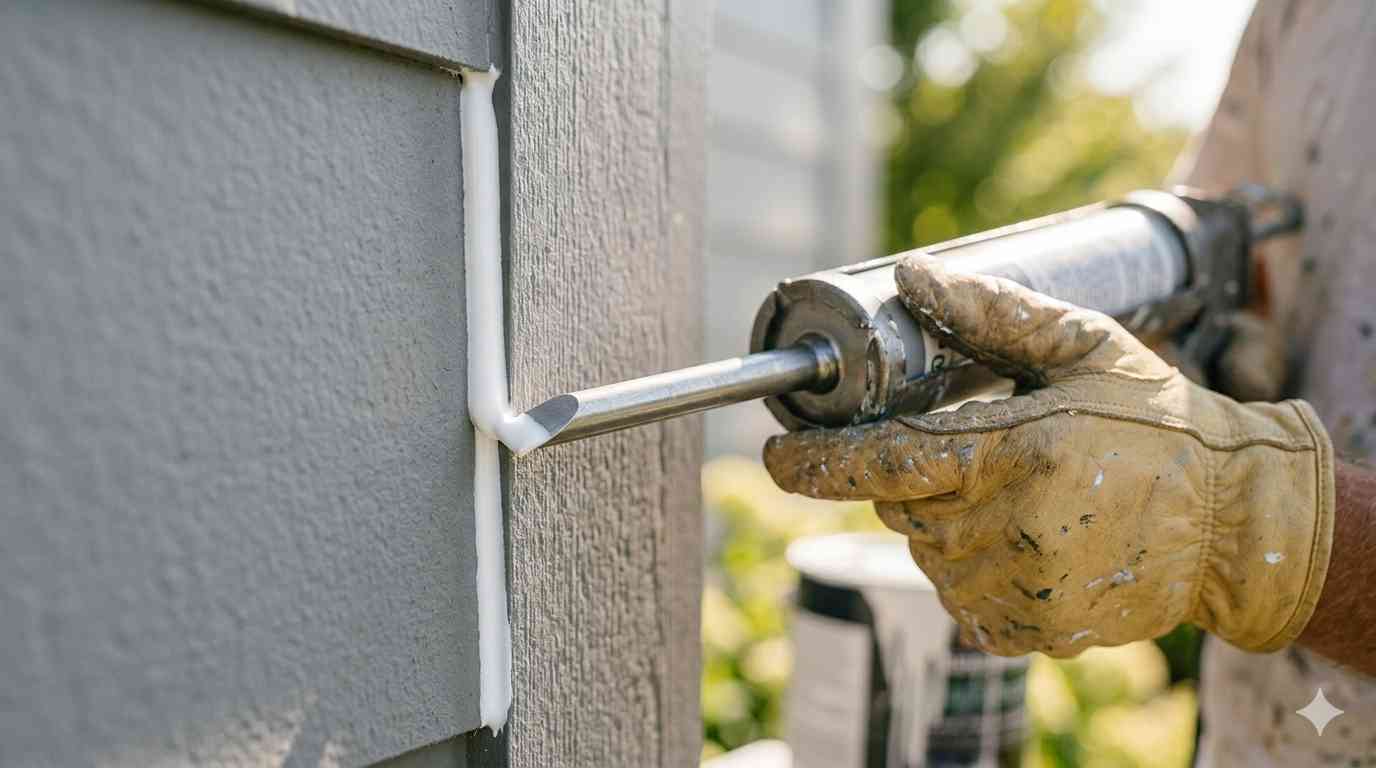
Safety Setup: Sanding fiber cement releases crystalline silica dust, which causes severe lung damage with prolonged exposure. You must wear a properly fitted N100 or P100 respirator—standard N95 dust masks do not provide adequate protection. Use a vacuum sander or contain the dust with plastic sheeting to prevent it from spreading. Wear safety glasses and chemical-resistant gloves when handling TSP solution.
Timeline: Allocate one full day for inspection, caulking repairs, and cleaning. Allow an additional half-day for drying before any sanding or priming begins. If you discover extensive caulk failures or cracked boards, add another half-day for repairs.
Step-by-Step Process for Painting Hardie Board Siding
Follow this sequence precisely. Each step builds on the previous one, and skipping any step creates a weak link that will fail prematurely.
1. Mask and protect all adjacent surfaces. Begin by covering windows, doors, and trim with plastic sheeting and high-quality painter’s tape. Extend masking at least 10 feet beyond the spray zone—overspray from an airless sprayer travels much farther than most DIYers expect. Seal the gap between the bottom of the siding and the foundation with tape or plastic to prevent paint from bridging onto concrete. Remove light fixtures and outlet covers rather than attempting to tape around them. This takes more time upfront but eliminates the risk of paint bonding to fixtures.
2. Apply alkali-resistant primer using spray-and-back-roll technique. Load your airless sprayer with high-bonding acrylic primer. Hold the gun perpendicular to the siding surface, maintaining a consistent distance of 12 to 14 inches. For lap siding, spray the underside of each board first—this area receives the least sunlight and stays damp longest, making it the most vulnerable to future failure. After spraying a 10-foot section, immediately back-roll with a 3/8-inch nap masonry roller. This step is non-negotiable. Rolling forces primer into the cement’s pores, breaks surface tension, and creates mechanical adhesion that spraying alone cannot achieve. Mistake to avoid: spraying without back-rolling leaves micro-pinholes that become entry points for moisture.
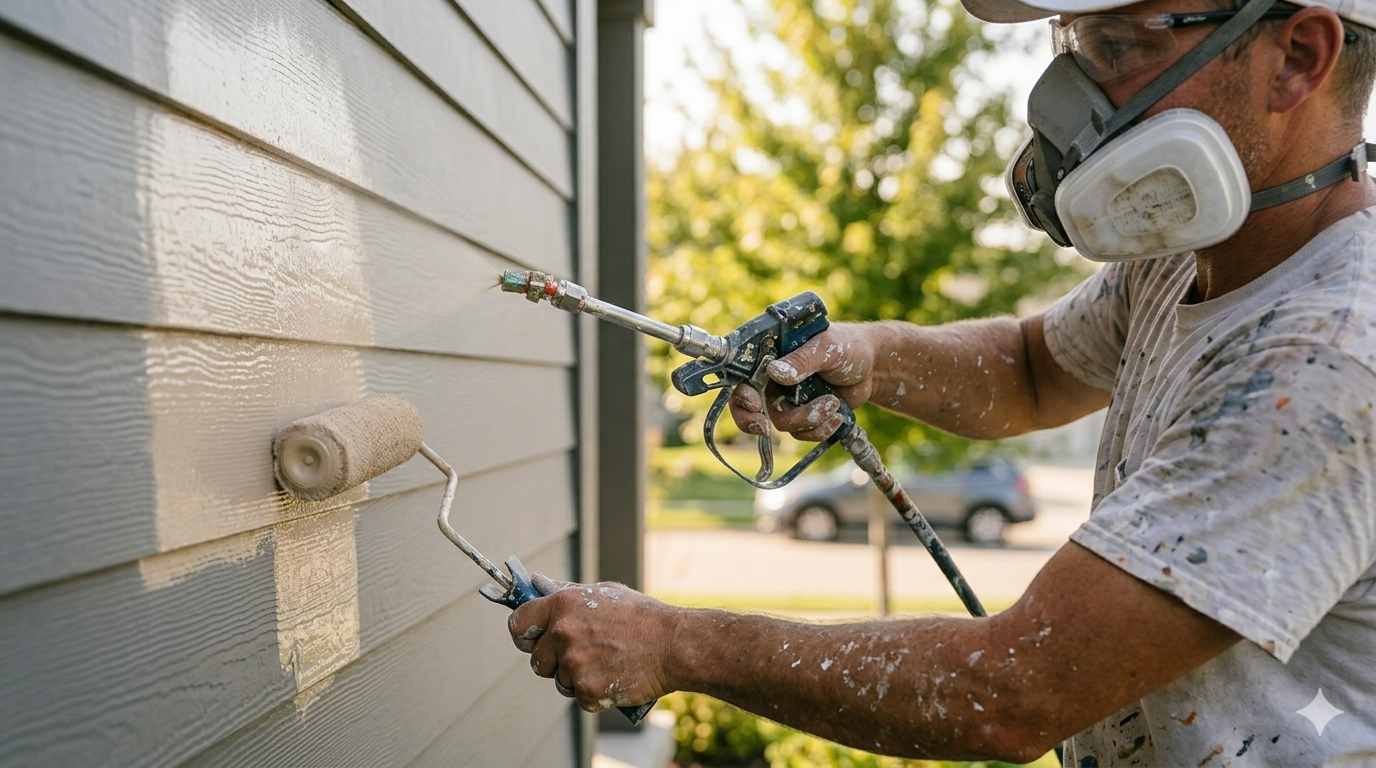
3. Allow primer to cure and inspect for coverage. Let the primer dry for 4 to 6 hours minimum, though overnight drying is preferable. After drying, inspect the surface in good light. Look for any missed spots, particularly on the undersides of lap boards and around corners. Touch up any thin areas with a brush before proceeding to topcoats.
4. Apply first topcoat with the same spray-and-back-roll method. Switch to your 100 percent acrylic latex masonry paint. Repeat the spray-and-back-roll process exactly as you did with primer. Focus on achieving even coverage rather than full opacity. The first coat establishes the bond and creates the base for color depth. Mistake to avoid: applying the first coat too thickly in an attempt to achieve full coverage. Thick coats dry unevenly and crack under thermal stress.
5. Apply second topcoat after full drying. Allow the first topcoat to dry completely—overnight is safest, though some premium paints allow 4 to 6 hours under ideal conditions. Apply the final coat using the identical spray-and-back-roll method. Two thin coats achieve a dry film thickness of 3 to 4 mils, which is the professional standard for durability. One thick coat cannot achieve the same results and is prone to mud cracking.
Timeline: Priming requires one full day. Allow a separate day for each topcoat, factoring in dry time between coats. Under ideal weather conditions (70°F, low humidity, indirect sun), you can complete priming and two topcoats in three to four days. Add two buffer days for unexpected weather delays or repairs.
Decision Layer When Painting Hardie Board Siding
Your approach must change based on the condition of your siding and the scale of your project.
New, Unpainted Hardie Board: The factory-applied primer is a temporary shop coat designed to prevent corrosion during shipping and installation. It is not a substitute for a field-applied primer coat. You must apply a full coat of alkali-resistant acrylic primer before any topcoats. Skipping this step leads to flashing (uneven sheen) and adhesion failure within two to three years. The factory primer provides a clean base but lacks the bonding strength required for long-term durability.
Previously Painted Hardie Board with Intact Paint: If the existing paint is fully adhered and not chalking, you can scuff-sand the surface to create tooth, then apply a bonding primer before topcoating. Test for chalking by rubbing the surface with a dark cloth. If the cloth picks up significant powder, you must power wash to remove the chalk layer before priming. Painting over chalk guarantees that the new paint will slide off the old binder.
Previously Painted Hardie Board with Peeling Paint: You must remove all loose paint before proceeding. Scrape until you reach firmly adhered edges, then feather the edges with sandpaper to create a smooth transition. Spot-prime all bare fiber cement areas with alkali-resistant primer, then apply a full coat of bonding primer over the entire surface before topcoating. Partial adhesion creates stress points where new paint will peel along the old failure lines.
Spraying versus Brushing and Rolling: Spraying with back-rolling is the professional standard for full-house projects. This method produces a seamless film with consistent millage across the entire surface. Brushing and rolling alone is acceptable for sheds, garages, or small repairs under 200 square feet. For full houses, brushing alone creates lap marks that become weak points where moisture infiltrates. If your house has two or more stories, extensive trim work, or if you have lead paint concerns on underlying layers, hire a licensed contractor.
Pro Tips for Painting Hardie Board
These insights come from 15 years of exterior painting experience and represent the difference between a job that lasts and one that fails prematurely.
- Respect the 24-hour moisture window. Hardie board absorbs moisture from the air and holds it longer than wood. If it rained yesterday, wait a full 24 hours of sun and wind after the surface looks dry before painting. Trapped moisture turns to vapor behind the paint film and blows it off the surface.
- Choose elastomeric caulk over standard acrylic. Standard caulk dries rigid and cracks as the house expands and contracts with temperature changes. Elastomeric caulk stretches up to 300 percent of its size and remains flexible for years. Pay particular attention to butt joints—the vertical seams between boards—as these are the most common failure points. A $15 tube of elastomeric caulk can add five years to your paint job.
- Check surface temperature, not just air temperature. Direct sunlight can heat Hardie board to 140°F even when the air temperature is 75°F. Paint applied to hot surfaces dries before it can properly coalesce, resulting in mud cracking and zero adhesion. Use an infrared thermometer to check surface temperature. If it exceeds 90°F, stop painting and wait for shade or cooler conditions.
- Back-roll every section immediately after spraying. This single step separates professional results from DIY failures. Rolling breaks the surface tension of the paint film and forces it into the cement texture. Spraying alone leaves a thin film that sits on top of the surface, and micro-pinholes become entry points for moisture. Back-roll while the paint is still wet—within two minutes of spraying.
- Store your paint for future touch-ups properly. Pour a small amount into a clean glass jar, seal tightly, and label with the date, color code, and sheen. Store in a climate-controlled space, not a garage that freezes. This ensures you have exact-match paint for the inevitable nicks and scratches that occur over years of use.
Common Mistakes When Painting Hardie Board
- Skipping primer on factory-primed boards. The factory coat is for corrosion protection, not paint adhesion. You still need a field-applied primer coat.
- Painting in direct sunlight. Surface temperatures above 90°F cause paint to dry too fast, leading to mud cracking and poor adhesion.
- Using vinyl-safe paint. These formulas are too soft for fiber cement. You must use 100 percent acrylic masonry paint.
- Ignoring the underside of lap siding. This area gets the least UV exposure and stays damp longest. If only the face is painted, the underside will peel first.
- Caulking with standard acrylic caulk. Rigid caulk cracks within a year, creating water entry points. Always use elastomeric sealant.
- Pressure washing above 3,000 PSI. High pressure forces water behind the siding, causing moisture problems that will blow paint off from the inside.
- Applying one thick coat instead of two thin coats. Thick coats dry unevenly and crack under thermal expansion. Two thin coats achieve proper film thickness without the risks.
Troubleshooting for Hardie Board Siding Paint Failures
Paint is peeling in large, thin sheets
Cause: The paint never achieved mechanical adhesion to the substrate. This typically happens when painting over a glossy, chalky, or unprimed surface. The paint film formed a skin that sat on top of the existing coating rather than bonding to it.
Fix: Remove all loose paint by scraping and power washing. Feather the edges of remaining paint with sandpaper. Apply a high-bonding, alkali-resistant primer to the entire surface—spot priming will not suffice. Apply two new topcoats. Partial repairs will fail along the transition lines between old and new paint.
Rust-colored stains bleeding through the paint
Cause: Unsealed or improperly galvanized nail heads are rusting, and the stain is migrating through the paint film. Acrylic paint cannot block rust stains.
Fix: Scrape the affected area to remove loose paint. Sand the rust spot down to bare metal. Apply an oil-based, stain-blocking primer specifically formulated for rust. Allow to dry completely, then recaulk the nail head with elastomeric sealant. Apply touch-up topcoat. Water-based primers will not block rust stains.
White, powdery residue on the surface
Cause: Efflorescence—mineral salts dissolved by moisture inside the cement, then deposited on the surface as water evaporates. This indicates persistent moisture behind the siding.
Fix: Scrub the surface with a stiff brush and a 50/50 solution of white vinegar and water. Rinse thoroughly and allow to dry. Do not paint until you identify and correct the moisture source. Common causes include leaking roof flashing, improperly sealed windows, or missing caulk at butt joints. Painting over active efflorescence guarantees that the salts will re-emerge and blow the new paint off within months.
Bubbling or blistering paint
Cause: Moisture vapor trying to escape from behind the siding. This occurs when you paint over a surface that was not completely dry, or when a leak exists behind the siding.
Fix: Pop a few bubbles to confirm the presence of moisture. If the substrate underneath is damp, you must wait for it to dry completely before repairing. If bubbles persist after drying, investigate for leaks. Common sources include roof penetrations, window flashing failures, and plumbing vents. Correct the moisture source, then scrape, prime, and repaint the affected area.
Cost & Time Estimate for Painting Hardie Board Siding
DIY Cost: For a 1,500-square-foot single-story home, expect to spend $500 to $1,100. This includes premium paint ($200–$400 for five gallons), primer ($150–$250), caulk and supplies ($100–$200), and airless sprayer rental ($80–$120 per day). If you purchase a sprayer instead of renting, add $400 to $800.
Professional Cost: Hiring a licensed painting contractor typically runs $2,800 to $7,000 for the same 1,500-square-foot home. Variables affecting price include:
- House height: Two-story homes cost 30 to 50 percent more due to ladder work and safety requirements.
- Trim complexity: Homes with intricate trim, multiple colors, or detailed architectural features add $500 to $1,500.
- Surface condition: Extensive caulk replacement, crack repair, or removal of failing paint adds $300 to $1,000.
- Location: Labor rates vary significantly by region, with urban areas commanding premium pricing.
Time Estimate: A DIYer should budget 5 to 7 days for a single-story home. Breakdown:
- Day 1: Inspection, caulking repairs, and initial masking.
- Day 2: Pressure washing, cleaning, and final drying.
- Day 3: Sanding, final masking, and primer application.
- Day 4: First topcoat application.
- Day 5: Second topcoat application and unmasking.
- Days 6–7: Buffer days for weather delays or unexpected repairs.
Professionals typically complete the same scope in 3 to 4 days with a crew of two to three painters.
Maintenance & Aftercare for Hardie Board Siding
A correctly painted Hardie board system lasts 12 to 15 years with proper maintenance. Neglect cuts that lifespan in half.
Annual soft wash: Once per year, use a garden hose with a soft-bristle brush to remove dirt, pollen, and cobwebs. Do not use a pressure washer on painted Hardie board—even at low settings, pressure washers can cut through the paint film and force water behind the siding.
Caulk inspection every spring: Walk the perimeter and examine all butt joints, corners, and transitions where siding meets trim. If you see hairline cracks or gaps, recaulk immediately. This single preventive action adds three to five years to your paint job by preventing water from reaching the edges of the paint film.
Touch-up protocol: Keep your labeled touch-up paint in a climate-controlled space. If a scratch or nick exposes bare fiber cement, spot-prime with alkali-resistant primer before applying touch-up paint. Delaying touch-ups allows moisture to compromise the edges of the surrounding paint film, turning a 15-minute repair into a full wall repaint.
Gutter maintenance: Clean gutters twice annually to prevent overflow. Water spilling from clogged gutters runs down the siding, keeping it constantly wet and accelerating paint failure along the water path.
Vegetation management: Keep shrubs, vines, and trees trimmed at least 12 inches away from siding. Vegetation traps moisture against the surface and creates shaded, damp conditions that promote mildew growth and premature paint failure.
FAQ
1. Can you paint over factory-primed Hardie board without priming again?
No. The factory primer is a temporary shop coat designed for corrosion protection during shipping, not long-term paint adhesion. You must apply a field coat of alkali-resistant acrylic primer before topcoating.
2. What is the best paint sheen for fiber cement siding?
Satin or low-lustre is optimal. This sheen provides moisture resistance and cleanability without highlighting surface imperfections like high-gloss sheens do.
3. Do I need a special respirator for sanding Hardie board?
Yes. Hardie board contains crystalline silica. Sanding creates hazardous dust that causes severe lung damage. Use an N100 or P100 respirator—standard N95 masks do not provide adequate protection for silica dust.
4. How long after painting Hardie board can it get wet?
Your final coat needs 24 hours of dry, above-freezing weather to cure enough to resist rain. Check your paint manufacturer’s data sheet—some premium paints require 48 hours before full water resistance.
5. Can I paint Hardie board a darker color than the original?
Yes, but dark colors absorb more heat, causing increased thermal expansion. You must use a 100 percent acrylic paint formulated for thermal movement. Standard exterior paints may not have the flexibility required for dark colors on cementitious surfaces.
6. Is it better to spray or brush Hardie board siding?
Spraying with back-rolling is superior for full-house projects. This method provides consistent film thickness and eliminates lap marks. Brushing alone is acceptable for small areas under 200 square feet.
7. What type of caulk should I use on Hardie board before painting?
Use paintable elastomeric polyurethane or siliconeized acrylic caulk. These remain flexible for years and accommodate the natural expansion and contraction of the building without cracking.
8. Why is my new paint bubbling on Hardie board?
Bubbles indicate moisture vapor trapped behind the paint film. This happens when you painted over a surface that was not completely dry or when a leak exists behind the siding. Allow the area to dry completely, identify and correct the moisture source, then repair.
9. How long should I wait after pressure washing before painting?
Wait at least 24 to 48 hours after pressure washing, depending on temperature, humidity, and sun exposure. Test by taping a square of plastic sheeting to the siding overnight. If moisture accumulates under the plastic, the siding is not dry enough to paint.
10. Can I paint Hardie board in winter?
Paint only when the surface temperature is between 50°F and 85°F. Low temperatures prevent proper curing, and paint applied in cold conditions will fail within months. Many premium paints require a minimum application temperature of 50°F for at least 24 hours after application.